Best SEO Tools in 2026: 25 Free, Paid, Local and AI Tools Compared
Best SEO Tools in 2026: 25 Free, Paid, Local and AI Tools Compared
Last updated: 16 October 2026
The best SEO tools in 2026 are not one product. Google Search Console tells you what Google already sees, an all-in-one suite such as Semrush or Ahrefs shows what competitors do, a crawler finds technical errors, and local businesses need a separate set of tools for Google Maps. A new group of AI-native tools, led by open-source projects like OpenSEO and Claude SEO, now lets you run research and audits from inside an AI assistant.
This guide covers 25 tools in six groups, with prices checked in October 2026, rupee costs for readers in Nepal, and step-by-step notes on how and where to use each one. If you only need the three big suites side by side, read our full Ahrefs vs Semrush vs Ubersuggest comparison.
Short answer
Start free with Google Search Console, Bing Webmaster Tools and Ahrefs Free. When you need competitor data, pick Semrush (SEO plus ads, daily rank tracking) or Ahrefs (backlinks and content research). On a small budget, use Ubersuggest or OpenSEO. For a shop, clinic or restaurant, add Google Business Profile and a map-grid tracker such as Local Falcon.
Quick picks: best SEO tool by use case
Best all-in-one
Semrush
Daily rank tracking, PPC data and a local add-on. From $139/month.
Best for backlinks and content
Ahrefs
Freshest link index and Content Explorer. From $29/month (Starter).
Best budget suite
Ubersuggest
$29/month or a one-time $290 lifetime plan.
Best free tool
Google Search Console
Real Google clicks, queries and indexing data for your site.
Best for local SEO
Google Business Profile + Local Falcon
Free profile plus map-grid rank tracking from $24.99/month.
Best open-source and AI-native
OpenSEO and Claude SEO
Pay-as-you-go data from $10/month, and a free audit skill for Claude Code.
Contents
How we compared these tools
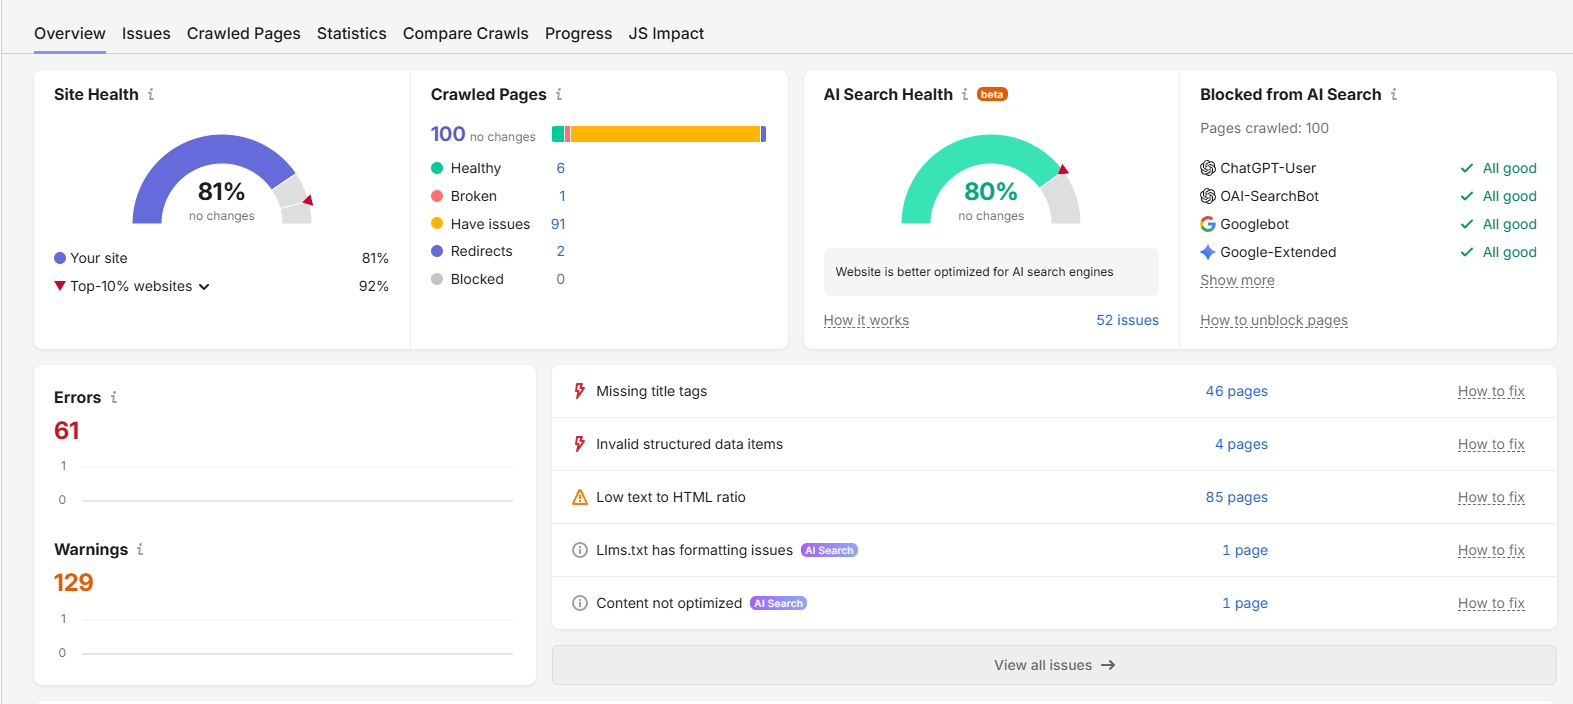
Every price in this guide comes from the vendor’s own pricing page or, where a vendor hides prices, from at least one independent pricing check dated 2026. Ahrefs, Screaming Frog and OpenSEO were re-checked on 16 October 2026; Semrush and Ubersuggest on 27 September 2026 for our three-way comparison. The screenshots show each tool’s real interface.
- What we judged: data quality, free tier, entry price, ease of use, and whether the tool helps a small site in a small market like Nepal.
- What we did not do: we took no payment from any vendor and this page has no affiliate links.
- Rupee figures use US$1 = Rs 155 (Nepal Rastra Bank selling rate, 8 October 2026). Your bank adds card and forex fees.
All 25 SEO tools in one table
Scroll sideways on a phone. “Entry price” is the cheapest paid monthly plan in US dollars.
| Tool | Type | Best for | Free option | Entry price |
|---|---|---|---|---|
| Semrush | All-in-one | SEO + ads, daily rank tracking | Free plan, 10 reports/day | $139 (Rs 21,545) |
| Ahrefs | All-in-one | Backlinks, content research | Ahrefs Free (own sites) | $29 Starter (Rs 4,495) |
| Ubersuggest | All-in-one | Beginners on a budget | 3 searches/day | $29 or $290 lifetime |
| Moz Pro | All-in-one | Domain Authority, link metrics | 30-day trial | $49 ($39 billed yearly) |
| SE Ranking | All-in-one | Agencies, affordable tracking | Free trial | $65 (about $52 yearly) |
| Google Search Console | Free | Real Google clicks and indexing | Free | $0 |
| Bing Webmaster Tools | Free | Bing indexing, AI performance data | Free | $0 |
| Google Analytics 4 | Free | Traffic and conversions | Free | $0 |
| Google Keyword Planner | Free | Search volume ranges, CPC | Free with Ads account | $0 |
| PageSpeed Insights | Free | Core Web Vitals | Free | $0 |
| Rich Results Test | Free | Checking schema markup | Free | $0 |
| Google Trends | Free | Seasonality, comparing terms | Free | $0 |
| Microsoft Clarity | Free | Heatmaps, session recordings | Free | $0 |
| Google Business Profile | Local | Google Maps listing | Free | $0 |
| Bing Places / Apple Business Connect | Local | Bing and Apple Maps listings | Free | $0 |
| Local Falcon | Local | Map-grid rank tracking | Trial | $24.99 |
| Semrush Local | Local | Listings, reviews, map heatmaps | — | $30 per location |
| Whitespark | Local | Citations, local rank tracking | Free mini tools | $1/location (GBP); $39 citations |
| BrightLocal | Local | Agencies with many locations | 14-day trial | Check current price |
| OpenSEO | AI-native, open source | Cheap pay-as-you-go research | Self-host free + API costs | $10 (usage included) |
| Claude SEO | AI-native, open source | Deep audits inside Claude Code | Free (MIT) | Needs a paid Claude plan |
| Ahrefs Brand Radar | AI visibility | Brand mentions in ChatGPT, AI Overviews | — | $199 |
| Screaming Frog | Technical | Deep site crawls | Free up to 500 URLs | $279/year |
| Surfer | Content | On-page content scoring | — | $99 |
| Rank Math / Yoast | WordPress plugin | Titles, schema, sitemaps | Free versions | Pro from about $8 |
Cheapest way into each paid tool
Entry price per month (USD)
Lowest monthly-billed paid plan, October 2026. Screaming Frog shown as its yearly licence divided by 12.
Best all-in-one SEO suites
An all-in-one suite combines keyword research, competitor analysis, backlink data, site audits and rank tracking. You need one when free tools stop answering the question “what are my competitors doing?”
1. Semrush: best all-in-one for SEO plus ads
Semrush, now owned by Adobe, is the broadest suite here. It is the only one of the big three that updates keyword rankings daily on every paid plan, and it has the deepest data on competitors’ Google Ads.
- Price: free plan (10 reports a day); SEO plan $139/month; SEO + AI Search plans from $199/month; 7-day trial.
- Use it for: keyword research with intent labels, keyword gaps against five competitors, daily position tracking, and a site audit that explains each fix in plain language.
- Watch out for: Local, Content and Advertising toolkits are paid add-ons, and extra users cost more.
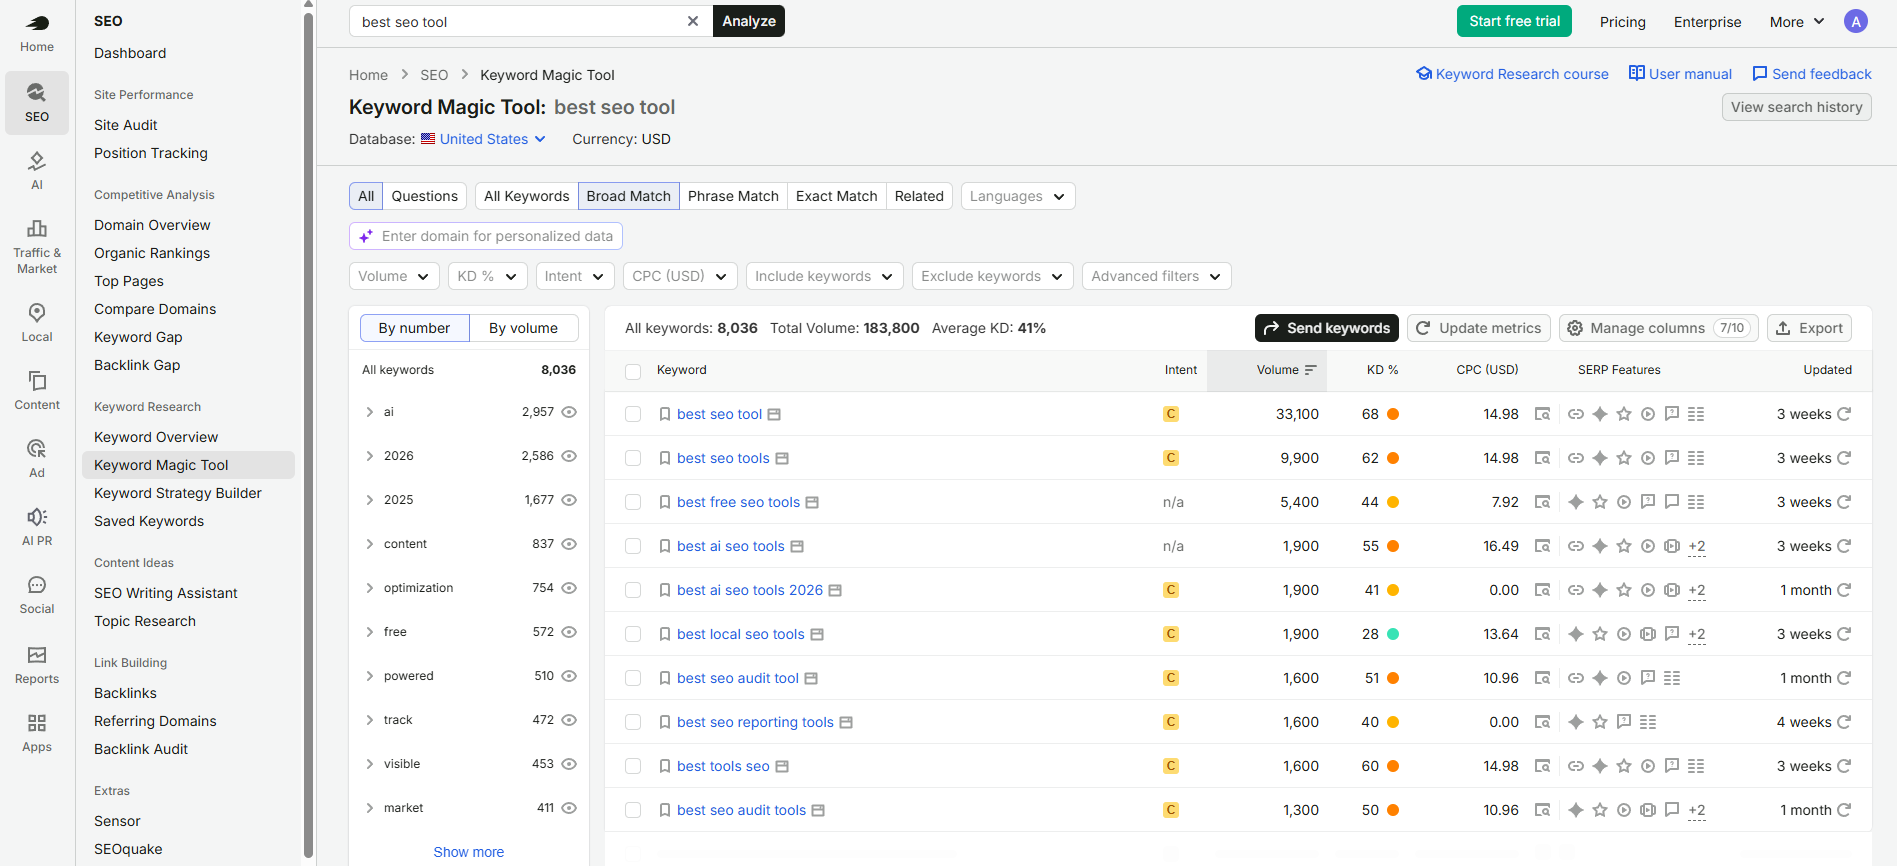
How to use it: open Keyword Magic Tool, type a seed keyword, choose your country database, then filter by intent (informational or commercial) and keyword difficulty below 30 for a newer site. Send the shortlist to Position Tracking so you see daily movement after you publish.
2. Ahrefs: best for backlinks and content research
Ahrefs has the freshest live backlink index of the three big suites and the best tool for deciding what to write next (Content Explorer, from the Standard plan).
- Price (checked 16 Oct 2026): Ahrefs Free for your own verified sites; Starter $29; Lite $129 (750 tracked keywords, 5 tracked AI prompts); Standard $249; Advanced $449. No free trial and no discounts; yearly billing saves up to 17%.
- Use it for: competitor backlink teardowns (Link Intersect), Content Gap, Traffic Potential when picking topics, and API or MCP access from Lite so AI assistants can query your data.
- Watch out for: rank tracking updates weekly on every plan, and Lite caps you at 1,000 credits per user.
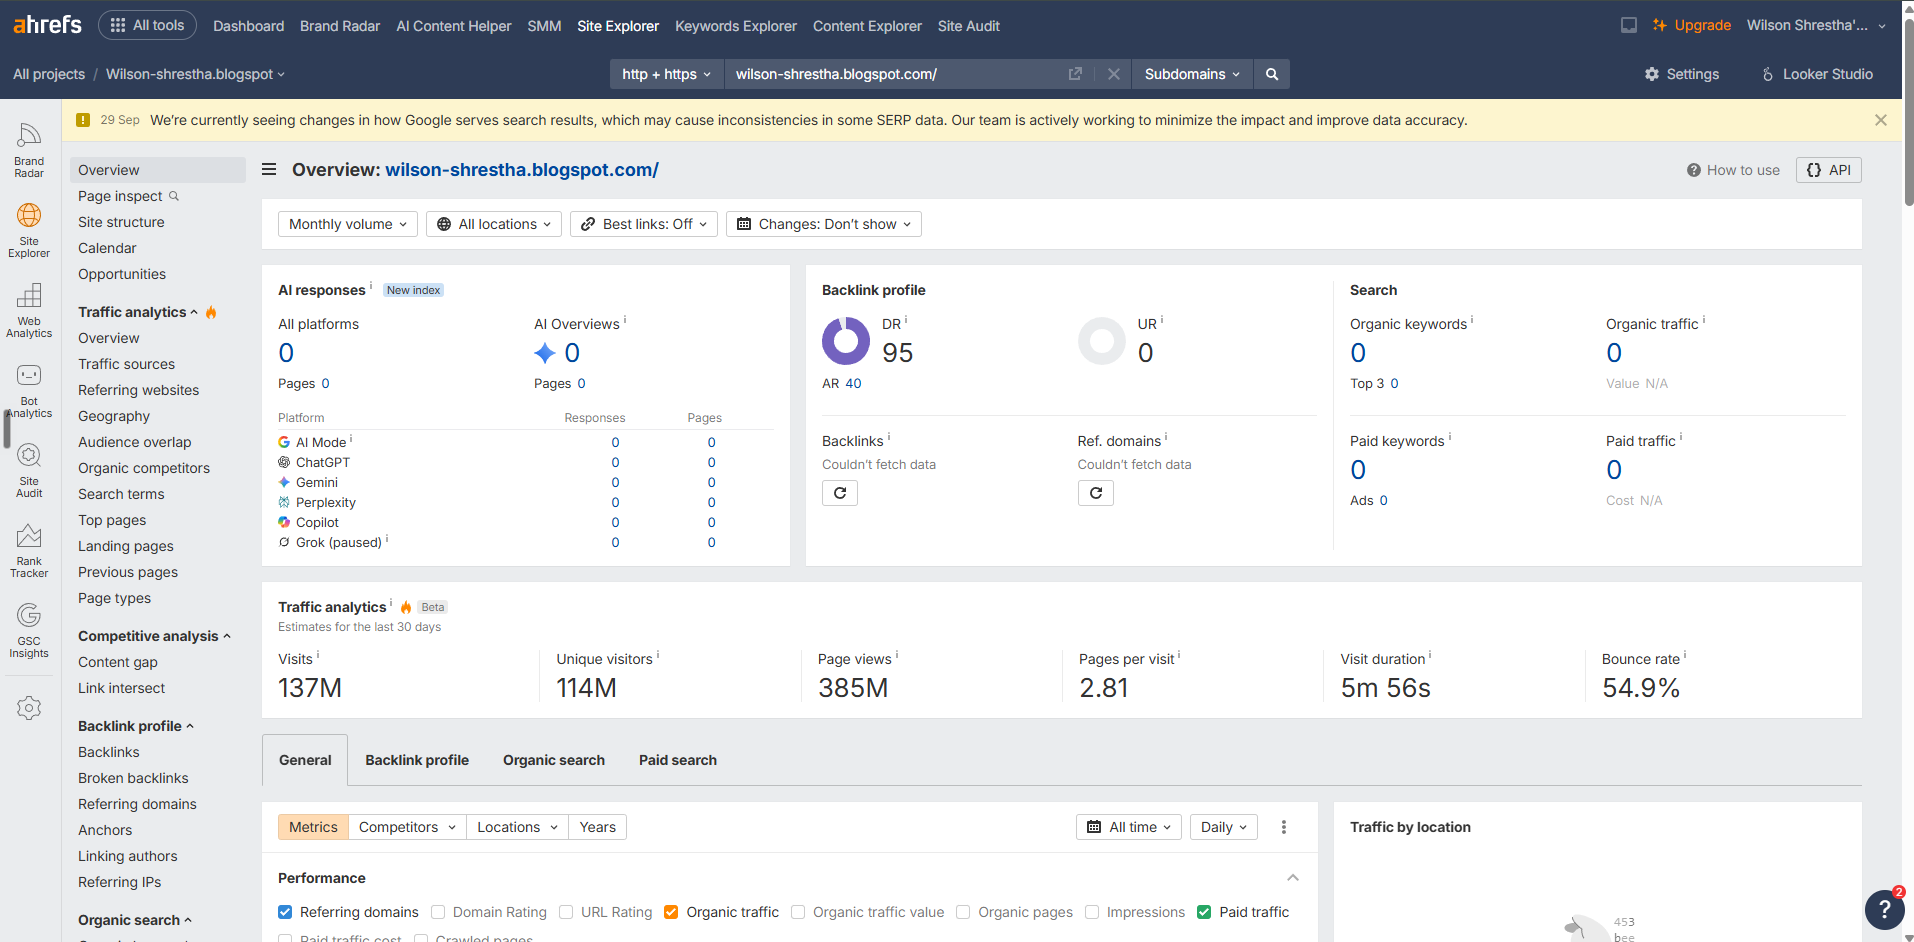
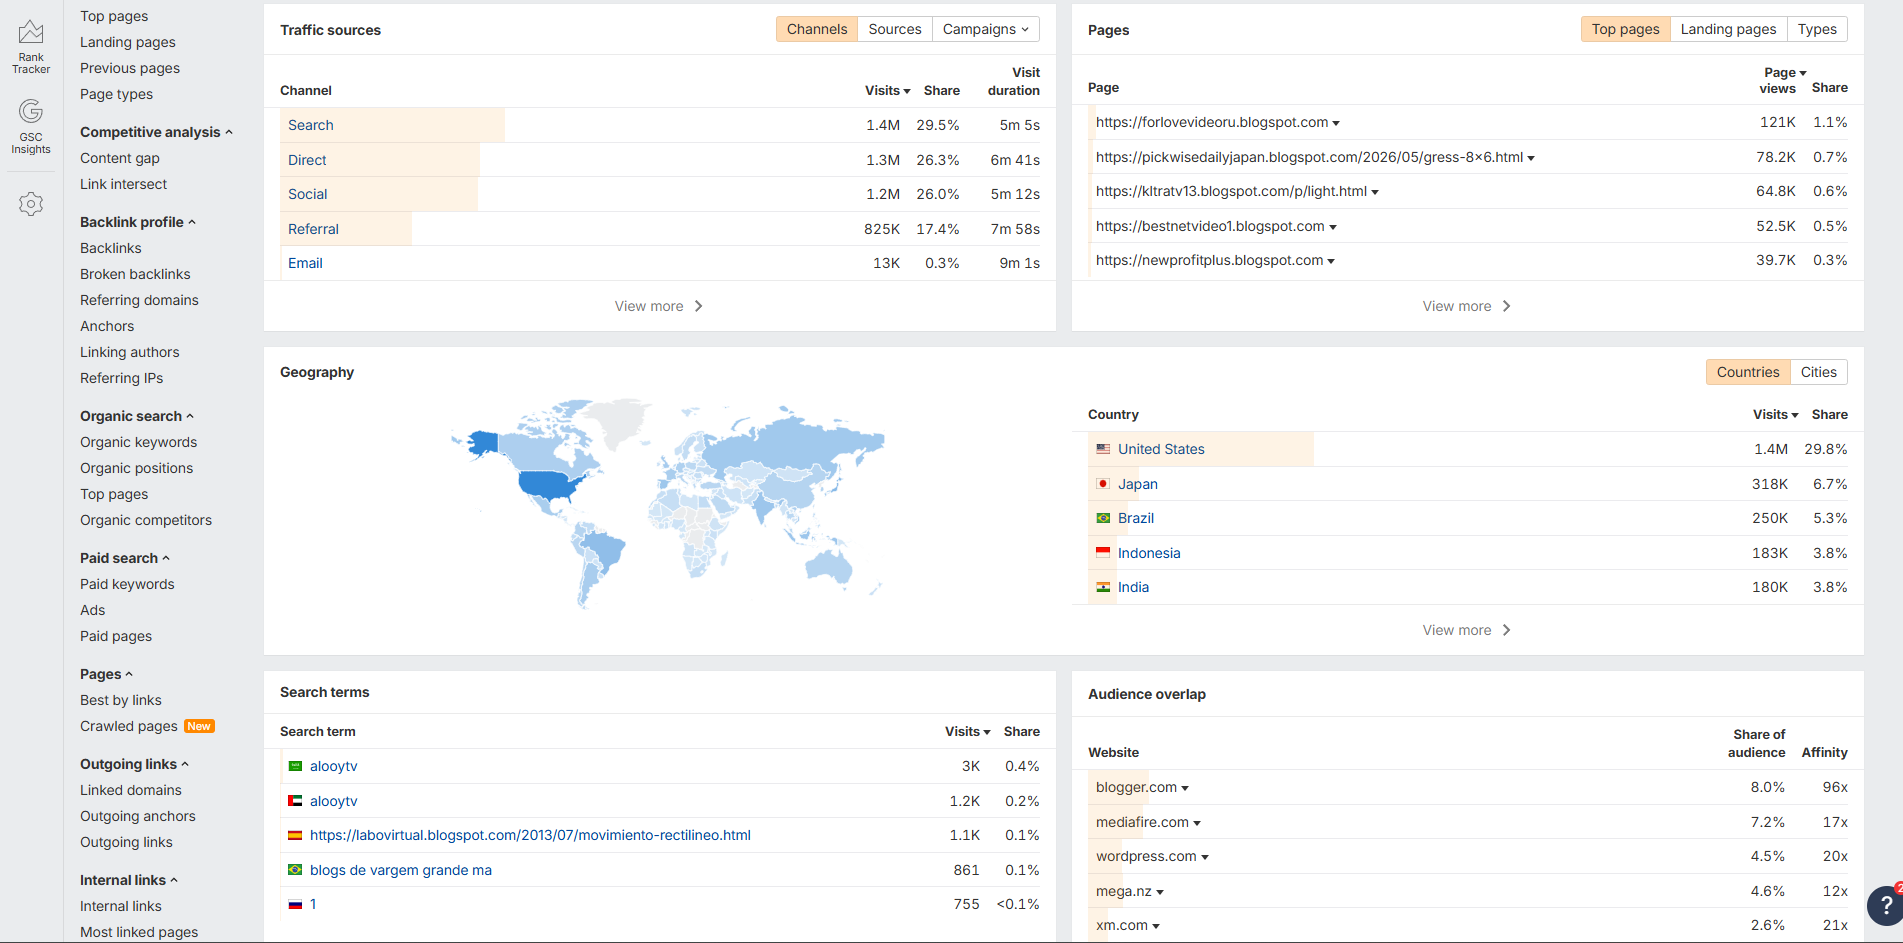
How to use it: verify your site in Ahrefs Free first (it costs nothing and unlocks Site Explorer and Site Audit for your own domain). Pay only when you need competitor data. In Site Explorer, enter a competitor, open Top pages to see which articles earn their traffic, then Referring domains to see who links to them.
3. Ubersuggest: best budget suite
Ubersuggest is the easiest of the suites to learn and the only one with a one-time lifetime price, which matters if you pay with a capped dollar card.
- Price: 3 free searches a day; Individual $29/month or $290 lifetime; Business $49; Enterprise $99; 7-day trial on monthly plans. Prices shown can differ by country.
- Use it for: keyword ideas, simple difficulty scores, weekly rank tracking (125 keywords per project on Individual) and a beginner-friendly site audit.
- Watch out for: much smaller backlink and keyword data than Ahrefs or Semrush, and no API.
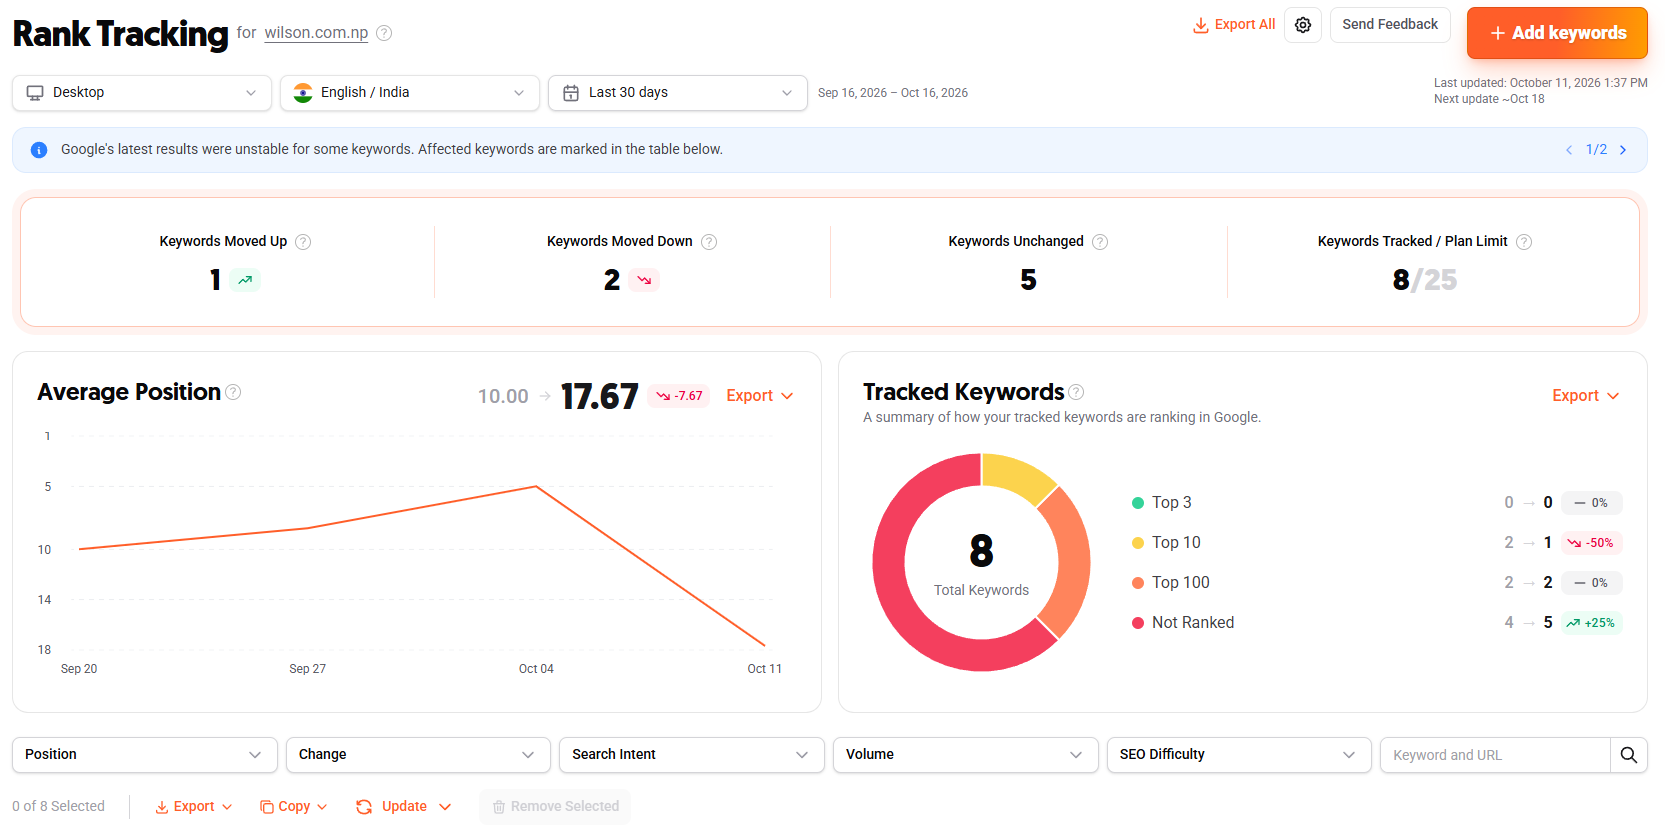
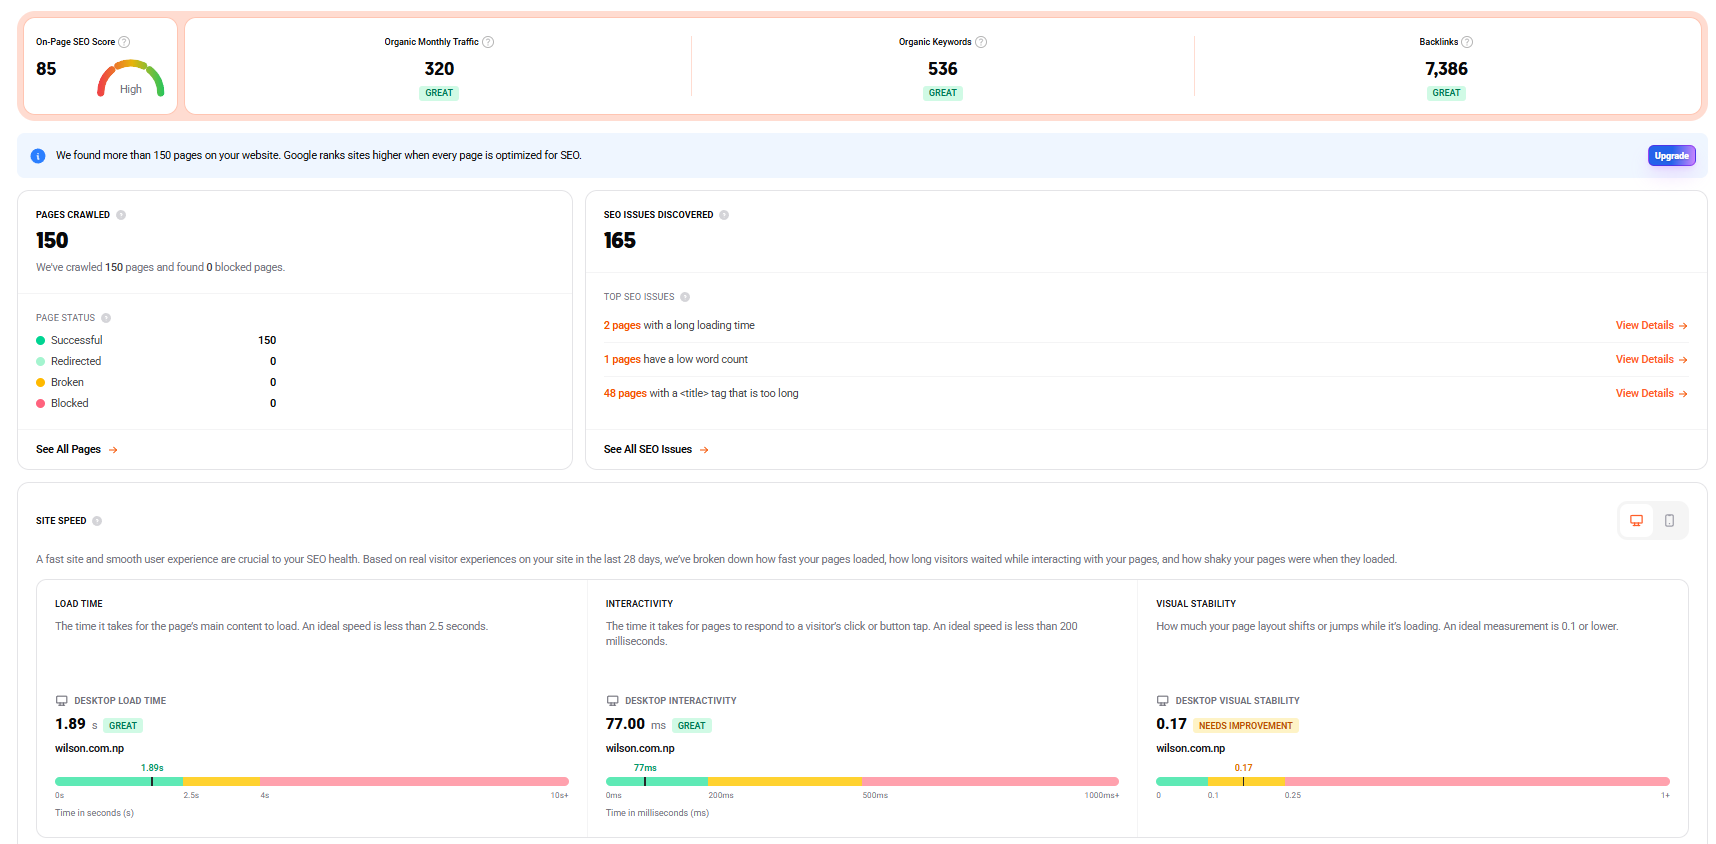
How to use it: add your site as a project, connect Google Search Console when asked, and let the weekly audit run. Fix “critical errors” first, then work through warnings. Use Keyword Ideas for blog topics, but treat its volumes as a direction, not a forecast.
Choosing between these three? Our Ahrefs vs Semrush vs Ubersuggest guide compares every plan, 3-year cost in NPR, keyword data, backlinks, rank tracking and AI visibility.
4. Moz Pro: best for authority metrics
Moz Pro created Domain Authority, still the number many link sellers and clients quote. Starter costs $49/month ($39 billed yearly) and Standard $99 ($79 yearly), with a 30-day free trial. Starter is tight (about 50 tracked keywords), so most users need Standard. Use Moz when you trade links or report DA to clients; the free MozBar extension shows DA on any page.
5. SE Ranking: best value for agencies
SE Ranking starts at about $65/month (around $52 billed yearly) with daily rank tracking, audits, white-label reports and an AI Overviews tracker. It suits freelancers managing three or more client sites; for a single blog, Ahrefs Starter or Ubersuggest is cheaper.
Best free SEO tools (use these first)
Free tools give you first-party data, which no paid tool can match for your own site. A new blog can reach its first few thousand monthly visitors with nothing else.
| Free tool | What to do with it | How often |
|---|---|---|
| Google Search Console | Submit your sitemap, check indexing, and filter Performance for queries with high impressions but low CTR, then rewrite those titles. | Weekly |
| Bing Webmaster Tools | Import your sites from Search Console in two clicks, submit URLs through IndexNow, and use its free site scan as a second opinion. | Monthly |
| Ahrefs Free | Verify your site to get Site Explorer and Site Audit on your own domain at no cost. | Monthly audit |
| Google Analytics 4 | Track conversions and see referral visits from ChatGPT, Perplexity and Gemini under Traffic acquisition. | Weekly |
| Google Keyword Planner | Check rough search volume ranges and CPC for Nepal or any country. Needs a Google Ads account but no live campaign. | When planning posts |
| PageSpeed Insights | Test LCP, INP and CLS on mobile for your template pages. | After design changes |
| Rich Results Test | Confirm your Article, Product or LocalBusiness schema is valid. | After adding schema |
| Screaming Frog (free) | Crawl up to 500 URLs for broken links, missing titles and redirect chains. | Monthly |
| Google Trends | Compare two keyword variants and spot festival seasonality, for example Dashain or Tihar searches. | When planning posts |
| Microsoft Clarity | Watch session recordings and heatmaps to see where readers stop scrolling. | On key pages |
| Semrush free plan | Ten reports a day for quick competitor lookups. | As needed |
For fixes these tools surface, see our guides to on-page SEO techniques and the SEO troubleshooting guide.
Best local SEO tools
Local SEO decides whether a business appears in Google Maps and the “map pack” when someone searches “dentist near me” or “momo restaurant in Thamel”. Rankings change street by street, so local tools measure positions across a grid of map points instead of one national number.
| Tool | Geo-grid tracking | GBP management | Citations | Reviews | Price |
|---|---|---|---|---|---|
| Google Business Profile | No | Yes (the profile itself) | No | Reply to reviews | Free |
| Local Falcon | Yes, flexible grids | No | No | No | From $24.99/mo |
| Semrush Local | Yes (Map Rank Tracker) | Yes, AI posting and replies | Yes (Local Pro) | Yes (Local Pro) | $30 or $60 per location |
| Whitespark | Yes (Local Ranking Grids) | Yes, $1 per location | Yes, Citation Finder from $39 | Reputation Builder | Sold per tool |
| BrightLocal | Yes | Yes | Yes | Yes | 14-day trial; prices rose in July 2026 |
| Ahrefs GBP Monitor | Location-based Rank Tracker | Beta, included from Lite | No | No | Included |
Claude SEO /seo local | Via /seo maps | Audits GBP signals | NAP consistency check | Review analysis | Free skill |
Google Business Profile, Bing Places and Apple Business Connect
These free listings are the foundation; no paid tool can rank a business that has not claimed its profile. Where to use: every business with a physical address or a service area. How: claim the profile at business.google.com, choose the most specific primary category, add opening hours, photos, products or services, and the same name, address and phone (NAP) used on your website and Facebook page. Then import the profile into Bing Places and claim the business on Apple Business Connect so iPhone Maps users find it too.
Local Falcon: map-grid rank tracking
Local Falcon pioneered geo-grid tracking in 2018. It drops a grid (from 3×3 up to 21×21 points) over your area and checks where your profile ranks at each point, producing a colour heatmap. Plans start at $24.99/month and use scan credits. Where to use: a restaurant, clinic or showroom that wants to know why it ranks first in Thamel but tenth in Lazimpat. How: connect the business, pick 2–3 money keywords, run a 7×7 grid with a 2 km radius, and rescan monthly after changes to categories, photos or reviews.
Semrush Local
Semrush’s Local toolkit costs $30 (Base) or $60 (Pro) per location per month. It adds a Map Rank Tracker with heatmaps, a GBP audit, an AI agent that drafts posts and review replies, and (on Pro) listing distribution to 70+ directories. Note for Nepal: the directory list varies by country and may not cover Nepal, so check before buying Local Pro. Local Base is usually enough for one location.
Whitespark and BrightLocal
Whitespark sells each tool separately: GBP management at $1 per location per month, Local Rank Tracker from $14/month, and Local Citation Finder from $39/month ($33 yearly), which finds where your top competitors are listed and you are not. BrightLocal bundles rank tracking, audits, citations and reviews for agencies running many locations; it has a 14-day trial, and prices rose by 5–10% in July 2026, so check the current figure.
A local SEO workflow for a business in Nepal
- Claim and complete your Google Business Profile, then copy the exact NAP to Bing Places, Apple Business Connect, Facebook and your website footer.
- Add LocalBusiness schema to your contact page and test it in the Rich Results Test.
- Ask every happy customer for a review using the review link from your profile, and reply to every review within a few days.
- Measure with a monthly Local Falcon or Semrush Local grid scan around your shop.
- Audit twice a year with Claude SEO’s
/seo localor BrightLocal to catch NAP mismatches and missing profile fields. - Build Nepal-specific listings by hand. Most citation tools focus on the US, UK and Australia, so local directories and business associations usually need manual submission.
New AI-native SEO tools: OpenSEO, Claude SEO and AI visibility
The biggest change in 2026 is SEO tools built for AI agents. Instead of reading a dashboard, you ask an assistant such as Claude, Codex or Cursor a question and it pulls live SEO data through an MCP server (Model Context Protocol, a standard way for AI apps to call tools). Two open-source projects lead this group.
OpenSEO: open-source, pay-as-you-go SEO research
OpenSEO is an MIT-licensed alternative to Semrush and Ahrefs, started in February 2026 by developer Ben Senescu and backed by Y Combinator. It covers keyword research, domain overview, backlinks, rank tracking, technical site audits and AI visibility tracking. It does not crawl the web itself: data comes from the DataForSEO API, and you pay only for what you query.
| Option | Cost | Best for |
|---|---|---|
| Hosted (openseo.so) | $10/month including $10 of usage; free trial with $0.50 of credits | Bloggers and small businesses |
| Self-hosted | $0 for the app, plus your own DataForSEO API bill | Developers and agencies |
| Typical usage | About $0.05 per keyword search and $0.08 per domain overview (OpenSEO’s estimator) | Light, occasional research |
How to set it up (self-hosted):
git clone https://github.com/every-app/open-seo.git
cd open-seo
docker compose up -d
# open http://localhost:3001 and paste your DataForSEO API key
- Connect it to an AI assistant: add the OpenSEO MCP server to Claude, Cursor or ChatGPT, then ask questions like “find low-difficulty keywords about Nepali typing and group them into topics”.
- Search Console data is free inside OpenSEO and does not use your credits.
- Where it fits: a solo blogger who runs 100 keyword searches and 20 backlink checks a month pays about $10 instead of $129 for Ahrefs Lite.
- Limits: a young project, its audit covers technical SEO only, and its data is only as good as DataForSEO’s, so it will not match Ahrefs on backlink freshness.
Claude SEO: a full SEO audit inside Claude Code
Claude SEO is a free, MIT-licensed plugin for Claude Code, Anthropic’s coding assistant. It is a community project by Agrici Daniel, not an Anthropic product. It runs 25 sub-skills and up to 15 parallel agents that check technical SEO, content quality (E-E-A-T), schema, AI-search readiness, local SEO and more, then write a prioritised report as Markdown and PDF. The repository had about 15,800 GitHub stars in October 2026.
What you need: Claude Code (included in paid Claude plans; see our Claude AI price in Nepal guide) and Python 3.10 or newer. Install from inside Claude Code:
/plugin marketplace add AgriciDaniel/claude-seo
/plugin install claude-seo@agricidaniel-claude-seo
/seo setup
| Command | What it does | Use it when |
|---|---|---|
/seo audit <url> | Full-site audit with a 0–100 score and action plan | Taking on a new client or site |
/seo page <url> | Deep single-page check | Before publishing an important post |
/seo local <url> | GBP signals, NAP consistency, reviews, map pack | Auditing a local business |
/seo maps | Geo-grid checks, GBP audit, competitor radius | Comparing local competitors |
/seo schema <url> | Detect, validate and generate JSON-LD | Adding Article or LocalBusiness schema |
/seo geo <url> | AI Overviews and AI-citation readiness | Pages you want cited by AI answers |
/seo google setup | Connects PageSpeed, CrUX, Search Console and GA4 | Once, to use real field data |
- Where it shines: sites built with Next.js, React or Vue, because it renders JavaScript pages with a headless browser; schema generation; and quick audits before a client call.
- What it is not: a data index. Keyword volumes and backlinks need optional paid extensions (DataForSEO, Ahrefs MCP) or your own Google API keys.
- Be careful: it installs scripts on your computer, so read the install file first, and check AI findings against Search Console before acting on them.
AI visibility trackers
These tools check whether ChatGPT, Gemini, Perplexity and Google’s AI Overviews mention or cite your brand. Ahrefs Brand Radar starts at $199/month standalone (Ahrefs plans include 5–20 tracked prompts). Semrush’s SEO + AI Search plans track 50–200 prompts daily. OpenSEO tracks prompts for about $0.002 per check. Bing Webmaster Tools now has a free AI performance report. For most small sites, the free option is enough: watch AI referrals in GA4 and test your key questions in ChatGPT and Gemini once a month.
Technical and content tools
- Screaming Frog SEO Spider – a desktop crawler, free up to 500 URLs and $279 per user per year after that. Version 24 can crawl with OpenAI or Gemini, render JavaScript, and pull Search Console and PageSpeed data into the crawl. Use it for migrations, redirect maps and finding orphan pages.
- Surfer – content scoring against the pages already ranking, from $99/month. Worth it if you publish several articles a week; otherwise a good outline and Search Console data do the same job.
- Rank Math and Yoast – WordPress plugins for titles, meta descriptions, XML sitemaps, breadcrumbs and schema. Both have free versions; pick one and never run both.
Paying for SEO tools from Nepal: what fits a $500 dollar card
Most Nepali freelancers pay with a prepaid dollar card, which Nepal Rastra Bank caps at $500 a year for most individuals (registered IT businesses can apply for higher limits). That one rule decides which tools are realistic.
One year of each tool vs the $500 limit (USD)
Cheapest plan for 12 months, before bank fees and any VAT. Green fits inside $500; red does not.
- Rent the big tools by the month. One month of Semrush ($139, about Rs 21,500) or Ahrefs Lite ($129, about Rs 20,000) fits easily. Do your competitor research in that month, export it, then cancel.
- Prefer one-time or usage pricing. Ubersuggest lifetime, Screaming Frog and OpenSEO all leave room on the card for hosting and other software.
- Avoid unofficial “group buy” accounts sold through local resellers. They break the vendors’ terms, can be shut off without warning, and expose your client data.
Recommended SEO tool stacks by budget
Rs 0 a month
New blogs and small businesses
- Google Search Console + Bing Webmaster Tools
- Ahrefs Free + Semrush free plan
- GA4, Clarity, PageSpeed Insights
- Rank Math or Yoast (free)
- Google Business Profile (if local)
About Rs 1,500–4,500 a month
Serious bloggers and freelancers
- Everything in the free stack
- OpenSEO ($10) or Ahrefs Starter / Ubersuggest ($29)
- Screaming Frog free, licence when you pass 500 URLs
- Claude SEO if you already pay for Claude
Rs 20,000+ a month
Agencies and companies
- Semrush or Ahrefs Lite/Standard
- Screaming Frog licence
- Local Falcon or Semrush Local per client location
- An AI visibility tracker for brand clients
Where each tool fits in an SEO workflow
| Stage | Free tool | Paid or AI tool |
|---|---|---|
| 1. Find topics | Search Console queries, Keyword Planner, Google Trends | Semrush Keyword Magic, Ahrefs Keywords Explorer, OpenSEO |
| 2. Study competitors | Semrush free plan, manual Google search | Ahrefs Site Explorer, Semrush Keyword Gap |
| 3. Write and optimise | Rank Math or Yoast | Surfer, Claude SEO /seo page |
| 4. Fix technical issues | Ahrefs Free audit, Screaming Frog (500 URLs), PageSpeed Insights | Semrush Site Audit, Screaming Frog licence, Claude SEO /seo audit |
| 5. Track results | Search Console, GA4 | Semrush Position Tracking (daily), Ahrefs or Ubersuggest (weekly) |
| 6. Win local searches | Google Business Profile, Bing Places | Local Falcon, Semrush Local, Whitespark |
| 7. Appear in AI answers | GA4 AI referrals, Bing AI report | Ahrefs Brand Radar, Semrush AI Search, OpenSEO prompts |
Mistakes to avoid when choosing SEO tools
| Mistake | Do this instead |
|---|---|
| Paying for a suite before setting up Search Console | Set up Search Console and Bing Webmaster Tools on day one; they are free and exact. |
| Trusting search volumes for small markets | For Nepal-focused keywords, volumes in every tool are rough. Compare with your own Search Console impressions. |
| Buying a yearly plan you will not use | Rent one month, finish the research, cancel. Most tools let you export. |
| Treating AI audit findings as fact | Verify each issue in Search Console or a crawler before changing a live site. |
| Ignoring Bing | Bing powers Microsoft Copilot and feeds other AI search products; submit your sitemap there too. |
| Running two SEO plugins at once | Keep one of Rank Math or Yoast to avoid duplicate titles and schema. |
Keep reading
Frequently asked questions
What is the best SEO tool in 2026?
There is no single best tool. Semrush is the most complete all-in-one suite, Ahrefs is best for backlinks and content research, and Google Search Console is the best free tool. Most sites need Search Console plus one paid suite at most.
What is the best free SEO tool?
Google Search Console, because it shows the real queries, clicks and indexing status Google records for your site. Pair it with Bing Webmaster Tools and Ahrefs Free for audits.
Is Ahrefs or Semrush better?
Ahrefs is better for link building and topic research; Semrush is better if you also run Google Ads or need daily rank tracking. Our Ahrefs vs Semrush vs Ubersuggest guide compares them plan by plan.
What are the best local SEO tools?
Start with a fully completed Google Business Profile, then add a map-grid tracker such as Local Falcon (from $24.99/month) or Semrush Local ($30 per location). Whitespark and BrightLocal add citation building and review management for agencies.
What is OpenSEO?
OpenSEO is an open-source, MIT-licensed SEO tool for keyword research, backlinks, rank tracking, site audits and AI visibility. You can self-host it free with your own DataForSEO API key or use the hosted version from $10 a month, and connect it to AI assistants through MCP.
Is Claude SEO made by Anthropic?
No. Claude SEO is a free community plugin by Agrici Daniel that runs inside Anthropic’s Claude Code. It audits technical SEO, content, schema, local SEO and AI-search readiness, and needs a Claude plan that includes Claude Code.
Can I pay for SEO tools from Nepal?
Yes, with a dollar card or an international card. Most individuals have a $500 yearly limit, which covers tools like Ubersuggest lifetime, Ahrefs Starter, OpenSEO or Screaming Frog, but not a full year of Semrush or Ahrefs Lite.
Do I need a paid SEO tool for a new blog?
Not at first. Free tools cover indexing, keyword ideas and technical checks. Pay for a suite when you need competitor keywords or backlink data, and consider renting it for one month at a time.
Sources
- Ahrefs: Plans and pricing (checked 16 Oct 2026)
- Screaming Frog: SEO Spider pricing (checked 16 Oct 2026)
- OpenSEO: Pricing and GitHub repository
- Claude SEO: GitHub repository and documentation
- Whitespark: Pricing
- Semrush and Ubersuggest plans, checked 27 Sep 2026 for our comparison
- Nepal Rastra Bank: Foreign exchange rates
Disclosure: This article contains no affiliate links. Prices change often; check each vendor’s pricing page before you buy.