

Blender is a 3D Modeling open-source software that is free to use for everyone. It is used in various industries like game development, animation, architecture, and Product design.
10 Tips for Mastering Blender 3D Model
- Understand the Interface
- Learn Keyboard Shortcuts
- Practice Basic Modeling Techniques
- Use Add-ons
- Master Texturing and Materials
- Learn Lighting and Rendering
- Use Physics Simulations
- Practice Animation Techniques
- Join Blender Communities
- Practice, Practice, Practice
1. Understand the Interface
The Blender interface could be overwhelming for novices and to use the program effectively, it is necessary to understand the interface. The interface has a range of windows, including the 3D view timelines, properties, and outliner. It is essential to spend time in the interface to utilize the software effectively and efficiently.
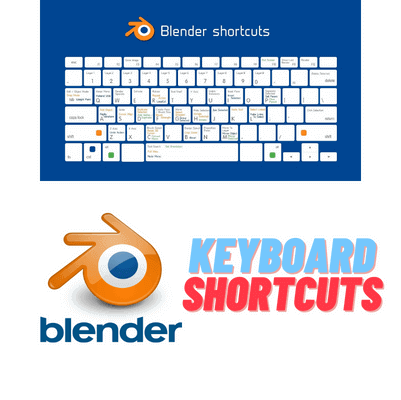
2. Learn Keyboard Shortcuts
To work faster Blender has an extensive list of keyboard shortcuts. So, I am recommending you, learn the shortcuts for speed workflow.
Here are the most commonly used Blender keyboard shortcuts:
- G: Grab/move
- S: Scale
- R: Rotate
- E: Extrude
- Ctrl + R: Loop cut
- Tab: Switch between edit and object mode
- A: Select all or deselect all
- Ctrl + Z: Undo
- Shift + D: Duplicate
- Shift + A: Add object
- Ctrl + S: Save
- Ctrl + E: Edge menu
- Ctrl + Shift + Alt + C: Set origin
- Shift + C: Move cursor to center
- Numpad period: Center view on selected object or frame current selection
- 1, 2, 3, etc. (on numpad): Orthographic views
- 0 (on numpad): Camera view
- Shift + F: Fly mode navigation
- Ctrl + B: Bevel
- Alt + C: Convert menu
- Alt + D: Linked duplicate
3. Practice Basic Modeling Techniques
Blender has various modeling techniques such as box modeling, sculpting, curve modeling, and Geometry nodes. As a beginner, it is recommended to start learning basic box modeling techniques. In box modeling, we can create a model from a simple cube by extruding, scaling, and rotating its vertices, edges, and faces.
4. Use Add-ons
We can use Various addons in Blender to enhance our workflow. I can be used for various tasks such as modeling, Uv unwrapping, rigging, and texturing.
>>>Download some Blender addons for free<<<
List of add-ons for 3D Modeling.
| Add-On Name | Functionality |
|---|---|
| Hard Ops | Advanced tools for boolean operations, bevels, and more |
| BoxCutter | Fast and efficient boolean operations |
| Mesh Machine | Collection of tools for automating common modeling tasks |
| Mira Tools | Collection of modeling tools for mirroring, symmetry, and alignment functions |
| SpeedFlow | Customizable interface for fast access to common modeling tools and functions |
| Asset Sketcher | Tool for quickly creating 3D models from 2D sketches |
| Auto Mirror | Automatically mirrors changes made to one side of a model to the other side |
| Retopoflow | Tools for creating new topology over existing models |
| TexTools | Tools for working with textures, including UV unwrapping and texture baking |
| Decal Machine | Quick addition of decals to 3D models |
List of add-ons for Uv unwrapping.
| Add-on | Description | Price |
|---|---|---|
| UV Pack Master | Provides efficient and automated UV packing for optimal texture resolution and minimal distortion. Includes alignment and distribution tools. | $34.99 |
| TexTools | Offers a suite of UV mapping tools including UV unwrapping, texture baking, and more. Free and open source. | Free |
| UV Toolkit | Provides advanced UV editing tools such as live unwrap and interactive packing, as well as a range of selection and transformation tools. | $24.99 |
| Magic UV | Offers a streamlined UV unwrapping workflow with tools for straightening, relaxing, and packing UV islands. Also includes texture alignment and distribution tools. | $25.00 |
| UV Squares | Focuses on creating evenly sized and spaced UV squares for easier texture painting and editing. Also includes tools for aligning and distributing UV islands. | Free |
Note: Price is accurate to mention from the Date of March 2023
List of addons for Texturing:
| Add-on Name | Features |
|---|---|
| Substance Painter Live Link | Provides a live link between Blender and Substance Painter, allowing for real-time updates and seamless workflow. |
| Texture Paint Layers | Adds layer support to Blender’s texture painting tools, allowing for more complex and flexible texturing workflows. |
| PBR Materials | A collection of physically-based materials and textures for use in Blender, including metals, plastics, and fabrics. |
| Grungit | A tool for adding grunge and weathering effects to textures, with a variety of presets and customization options. |
| Poliigon Material Converter | Converts textures downloaded from the Poliigon library into ready-to-use materials in Blender, with support for node-based workflows. |
List of Best addons for Rigging:
| Add-on Name | Features |
|---|---|
| Rigify | Automatic rigging system with customizable templates |
| Auto-Rig Pro | Comprehensive rigging solution with advanced features |
| BlenRig | Modular rigging system with pre-built modules for different character types |
| Rigging Toolbox | Collection of tools for rigging, including bone picker and weight transfer |
| Pitchipoy | Flexible rigging system with focus on cartoon-style characters |
List of best add-ons for Geometry Nodes
| Addon Name | Features |
|---|---|
| Animation Nodes | Allows the creation of complex animations and procedural motion graphics using geometry nodes |
| Geo Nodes Plus | Provides a library of pre-built nodes and node groups for creating geometry |
| Node Expressions | Allows for more advanced control and customization of geometry nodes through the use of expressions |
| Animation Nodes Falloffs | Adds additional falloff shapes for controlling the effect of nodes on geometry |
| GN Procedural Tree | A library of nodes for creating customizable procedural trees and plants |
Best Addons for Animation
| Addon Name | Features |
|---|---|
| Animation Nodes | Node-based animation setup, procedural animation |
| Rigify | Pre-made rigs for characters and objects, easier rigging process |
| BlenRig | Advanced rigging system, pre-made rigs for characters, custom rigging tools |
| BVH Importer | Import of motion capture data, realistic character/object animation |
| MocapX | Motion capture tools, capture motion using mobile device, transfer to Blender |
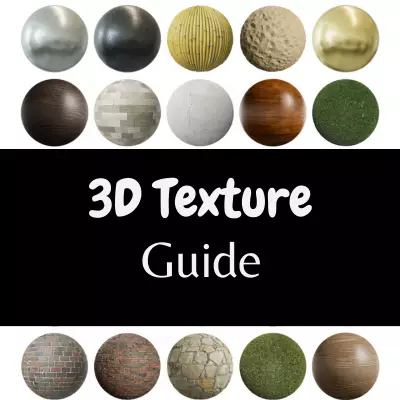
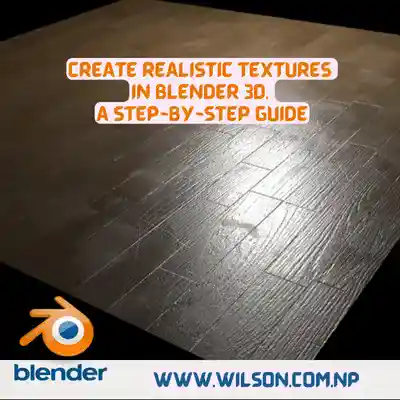
5. Master Texturing and Materials
Texturing and materials are important to create realistic 3D models. Blender has a powerful texturing system that allows you to create complex materials using nodes. Nodes can be linked together to create complex material that can produce various effects.
It can produce real-world materials such as wood, metal, fabric, or skin. Nodes can control factors such as color, glossiness, roughness, transparency, and many more.
6. Learn Lighting and Rendering
Lighting and rendering play a crucial role in creating realistic 3D models. Blender has a powerful rendering engine known as Cycles that can produce realistic renders. By learning lighting techniques like three-point lighting and HDRI LIghting you can enhance the realism of the renders.
Three-point lighting involves using three lights to create a balanced and natural-looking scene. The Three-point are Key light, fill light, and backlight.
The Key light provides the main light source, the fill light fills in the shadows, and the backlight creates depth and separation from the background.
HDRI Lighting uses HDRI images as the background of the scene. The image provides a realistic and dynamic lighting environment that can produce realistic shadows and reflections.
7. Use Physics Simulations
Blender has a powerful physics engine that can add a level of realism to 3D models. There are various types of Simulation such as fluid, cloth, and particle simulations.
Fluid simulations can be used to simulate water, fire, smoke, and other fluids.
Cloth simulations can be used to simulate fabrics and other deformable materials.
Particle simulation can be used to simulate various effects such as dust, rain, and snow.
By understanding these physic simulations in Blender you can enhance your ability to create realistic 3D models.
8. Practice Animation Techniques
Blender3D has animation techniques like keyframing and graph editor that can be used for character animation and motion graphics.
Other animation techniques such as squash & Stretch, secondary motion, and timing & spacing can also enhance your animations.
Note: It is not really necessary to learn Animation Techniques for 3D modeling but learning this basic animation will help you to create an attractive showreel and this will be plus point for 3d modeling projects.
9. Join Blender Communities
A large and active community of blenders can provide valuable resources and support to users. Join the Blender Communities such as Blender Artists and Blender Stack Exchange, which can give you access to a wealth of knowledge and expertise.
You can learn techniques, get feedback on your work, and ask for help with any problems you encounter. By doing this you will build good connections with other artists and potentially lead to job opportunities or collaborations.
10. Practice, Practice, and Practice.
Practice is essential to master Blender 3D Modeling Software. You must keep practicing until you feel confident in your skills and techniques. It will help you to improve your speed, accuracy, and workflow. Seek feedback from others, whether it’s from Blender communities or professionals in the industry.
Tips for Practicing.
- Start with simple projects: At the beginning, start with simple projects and gradually move on to complex ones. This will help you to build your skills and confidence.
- Use references: Use many references from images and videos of the real object to create more accurate and realistic models.
Break it down: Break down complex projects into smaller ones, this will help you to feel easy and stay focused. - Experiment: Don’t be afraid to experiment with different techniques and tools. This will help you to discover new ways to approach your projects and gradually improve your skills.
- Get Feedback: Share your work with other seniors or expert mentors to get and identify areas where you need to improve and get tips.
- Make a journal of your progress: keep track of what you learn and the challenges you have faced. This will identify what you are learning and what you need to learn to identify areas where you need to focus.
- Take breaks: Take breaks when you need them. Working for long periods of time without a break can lead to burnout and make it harder to stay focused.
Mastering Blender can be a challenging task, but it is achievable with practice and dedication. By understanding the interface, learning keyboard shortcuts, and practicing basic modeling techniques, you can start creating impressive 3D models in no time. Using add-ons, mastering texturing and materials, and learning lighting and rendering can take your models to the next level. Joining Blender communities and practicing regularly can help you become a Blender master.

hello
hi
wow bro 10q