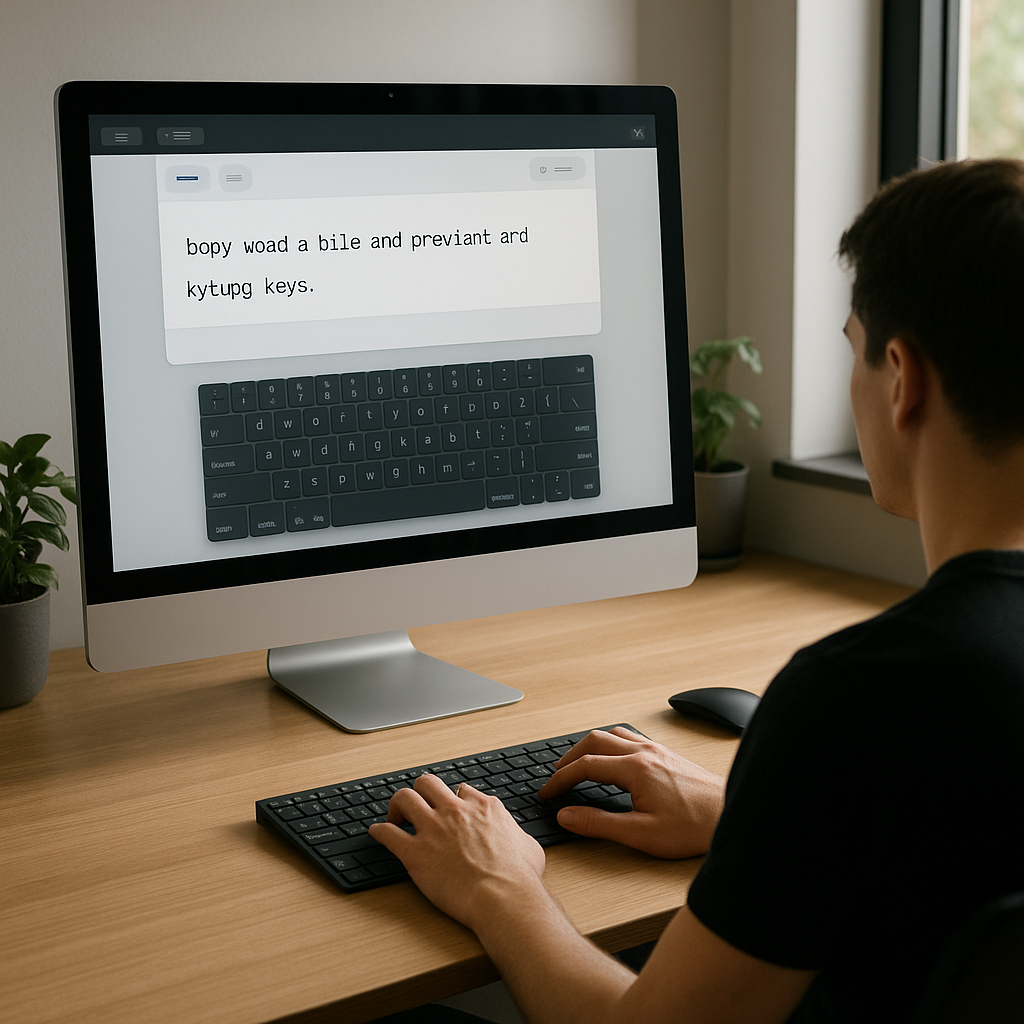
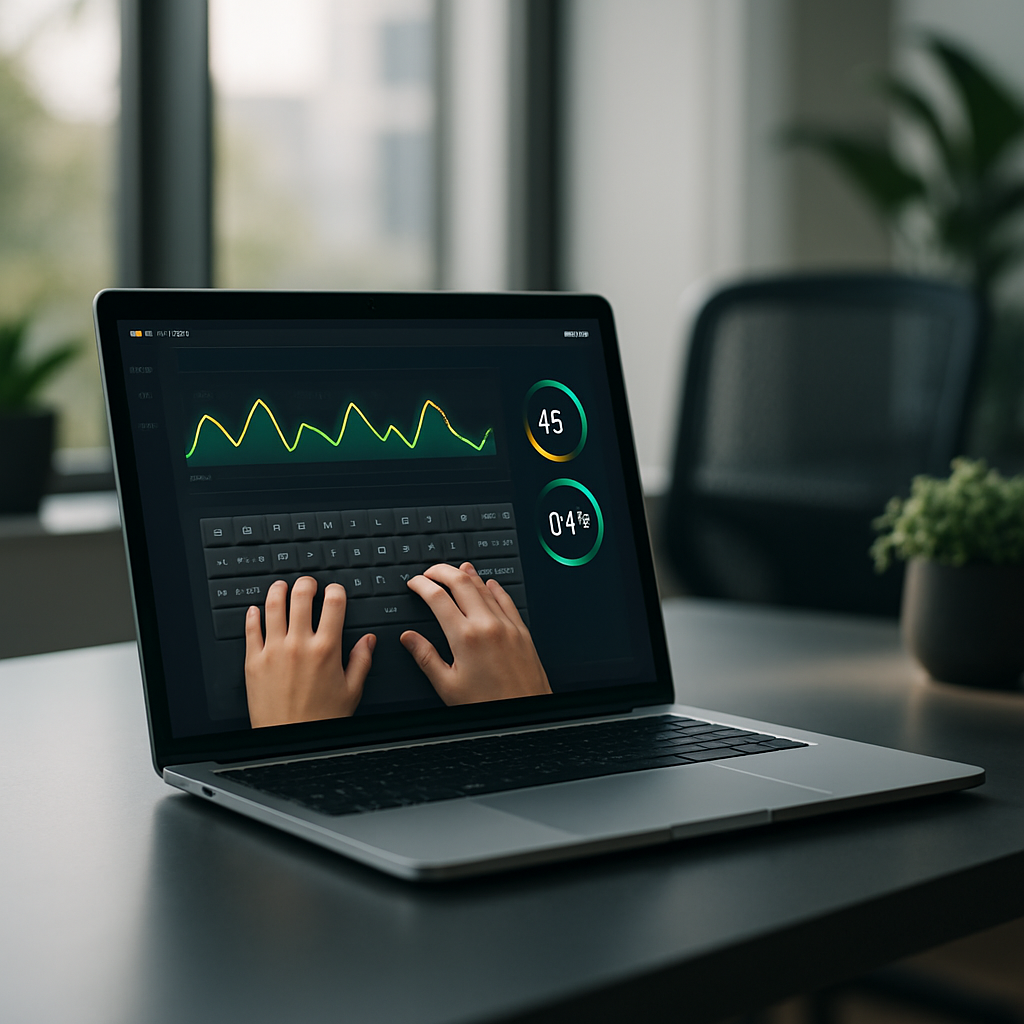
Are you looking to increase typing speed in Typeshala? Whether you’re a student or a professional, improving your typing skills can significantly enhance your productivity. Typeshala is an excellent tool for honing your typing skills through systematic practice. In this guide, we’ll delve into practical techniques and advanced tips to help you boost your typing speed efficiently.
Understanding Typeshala for Typing Practice
Typeshala is a popular typing tutor software that combines both Nepali and English language typing exercises. This makes it an excellent resource for those aiming to increase their typing speed in a bilingual setting.
Setting Up Typeshala
To get started with Typeshala, follow these steps:
Download and Install: Ensure you download Typeshala from a [trusted source](https://example.com/typeshala-docs) to avoid any security risks.
Setup: Follow the installation guide provided to set up the software on your computer.
Customize Settings: Adjust the settings to suit your comfort level. This includes font size, background color, and language preference.
Basic Features Overview
Familiarizing yourself with Typeshala’s interface is crucial:
Typing Exercises: Typeshala offers a wide range of exercises that cater to different skill levels.
Progress Tracking: The software provides detailed feedback on your typing performance, allowing you to monitor improvements.
Keyboard Layout Guides: Visual aids help you learn correct finger positioning.
Effective Techniques to Increase Typing Speed
Now that you have Typeshala set up, it’s time to focus on techniques that will increase your typing speed.
Proper Posture and Hand Positioning
Maintaining an ergonomic posture is essential for both speed and comfort:
Sit Upright: Your back should be straight, and your feet flat on the floor.
Keyboard Placement: Position the keyboard at elbow height to reduce strain.
Finger Placement: Use the home row keys as your base position.
💡 Pro Tip: Consistently practicing the correct posture can prevent fatigue and improve your typing speed over time.
Regular Practice Sessions
Consistency is key when it comes to improving typing speed:
Daily Practice: Dedicate specific time slots each day to practice typing.
Set Goals: Aim for incremental increases in speed to stay motivated.
Use Typing Games: Engage with typing games to make practice sessions more enjoyable.
Advanced Tips for Improving Typing Accuracy
As you become more comfortable with basic typing exercises, you can leverage Typeshala’s advanced features to further refine your skills.
Utilizing Advanced Features
Typeshala offers several features that can help you enhance your typing accuracy:
Speed and Accuracy Tests: Regularly test yourself to identify areas of improvement.
Custom Exercises: Create exercises that focus on your weak points for targeted practice.
Monitoring Progress
Analyzing your progress is crucial for continuous improvement:
Review Statistics: Regularly check your typing speed and accuracy statistics.
Set Benchmarks: Use these statistics to set new goals and track your improvement.
⚠️ Important Note: It’s essential to balance speed with accuracy to avoid developing bad habits that could hinder your overall progress.
By integrating these practical tips and advanced strategies, you’ll be well on your way to mastering typing with Typeshala. Remember, the key to increasing your typing speed is consistent practice, proper technique, and the effective use of software tools. For further reading, you can explore the [Typeshala official documentation](https://example.com/typeshala-docs) for more technical insights and guidelines.
For additional resources on typing practice, you may also find our internal article on [How to Set Up an Ergonomic Workspace](https://example.com/ergonomic-workspace) helpful.
Frequently Asked Questions
How can I set up Typeshala for optimal use?
Follow the installation guide and customize settings for comfort.
What are the best practices for increasing typing speed?
Focus on consistent practice and maintaining proper posture.
How often should I practice typing to see improvement?
Daily practice is recommended for noticeable progress.
Can Typeshala help with typing accuracy?
Yes, it offers features to monitor and improve accuracy over time.
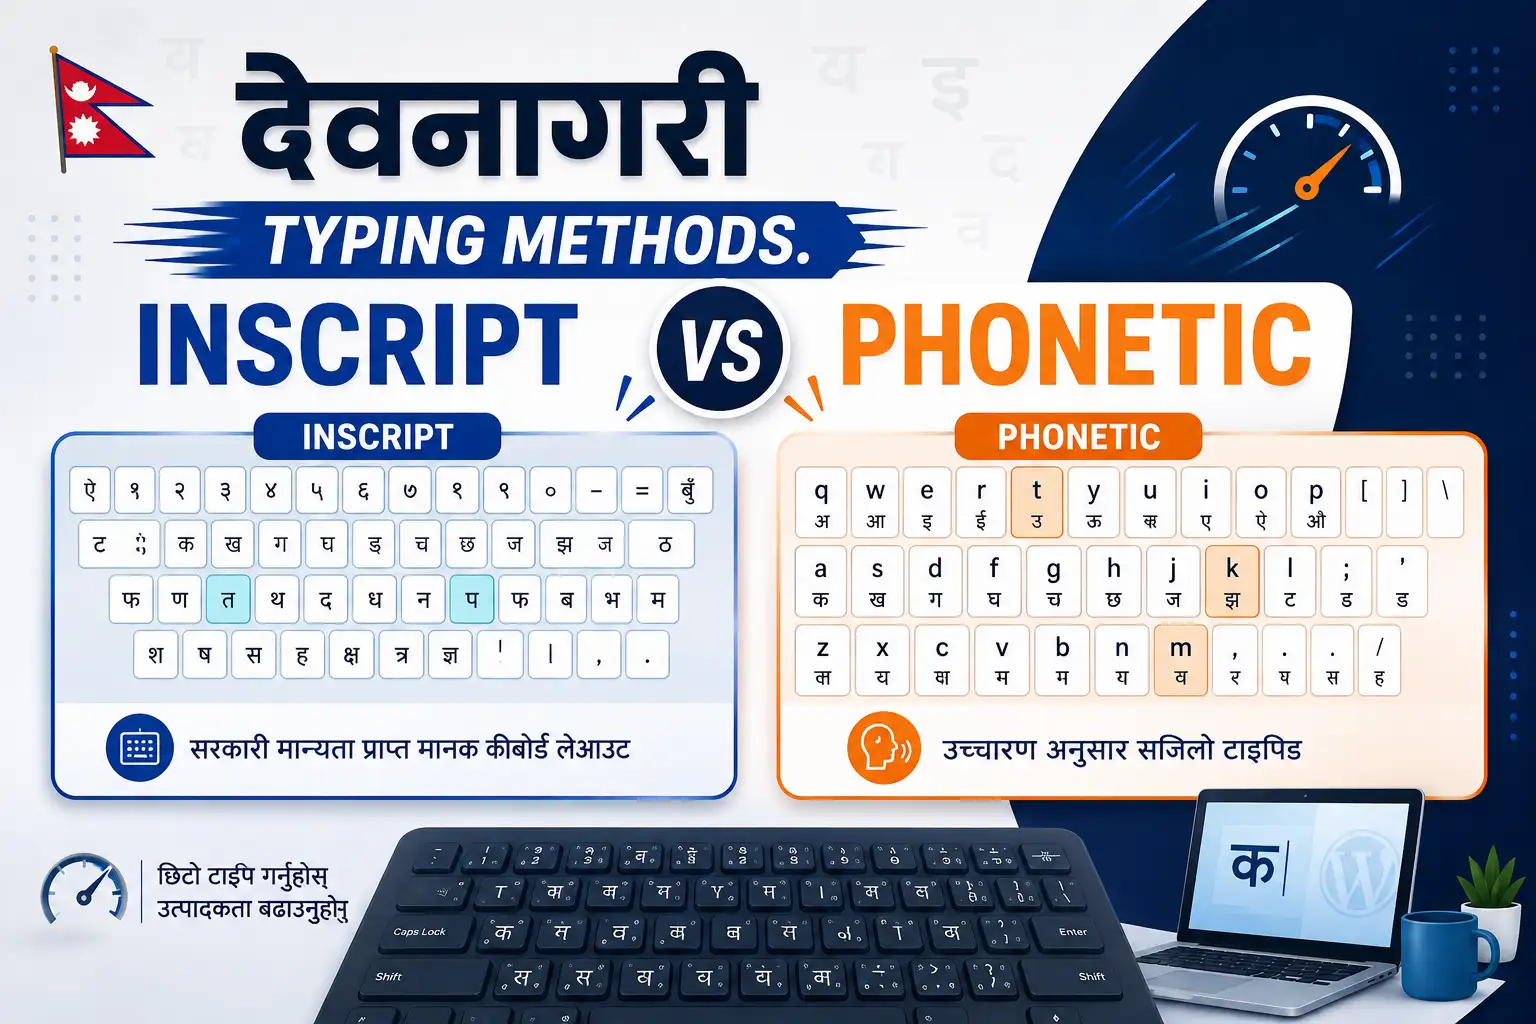
In the realm of digital communication, Devanagari typing methods have become indispensable for anyone engaging with languages like Hindi, Marathi, and Nepali. As more people turn to digital platforms for communication, understanding the nuances of Devanagari typing systems becomes crucial. Two primary methods dominate the landscape: Inscript and Phonetic. This article explores these methods, offering insights into their workings, advantages, and the contexts in which they excel.
Introduction to Devanagari Typing Methods
History and Evolution
The Devanagari script, used for over 120 languages, has a rich history that dates back to ancient times. With the advent of computers, the need for efficient Devanagari typing methods became evident. Initially, typing in Devanagari was cumbersome due to a lack of standardized methods. However, the development of Unicode and keyboard layouts like Inscript revolutionized this space. Today, Devanagari typing is integral to modern computing, facilitating seamless communication in native languages.
Importance in Modern Computing
In today’s digital age, the ability to type in Devanagari is vital for accessing information, creating content, and communicating effectively in several languages. Both Inscript and Phonetic typing methods cater to different user needs, making them pivotal in bridging linguistic and technological gaps.
Understanding Inscript Typing
Layout and Design
The Inscript typing method is a standardized keyboard layout designed by the Government of India. It maps the Devanagari characters to specific keys on the keyboard, allowing users to type directly in Devanagari. The layout is intuitive for those familiar with the script, as it follows the logical sequence of characters.
For a detailed guide on the Inscript layout, refer to the [Government of India’s Inscript keyboard layout guide](https://www.meity.gov.in/content/inscript-keyboard).
Advantages of Inscript Typing
Standardization: Inscript is a standardized layout, ensuring consistency across devices and platforms.
Direct Input: Users can type in Devanagari without converting from another script, making it ideal for formal and professional use.
Comprehensive Character Set: It supports a wide range of Devanagari characters, including rare and complex symbols.
💡 Pro Tip: Familiarize yourself with the Inscript layout through online typing tutors to improve speed and accuracy.
Exploring Phonetic Typing
How Phonetic Typing Works
Phonetic typing translates the phonetic sounds of Devanagari words into Roman script. For example, typing “namaste” will convert into “नमस्ते.” This method leverages the familiarity of the Roman alphabet, making it accessible to new learners and casual users.
Benefits and Drawbacks
Accessibility: Phonetic typing is user-friendly, especially for those who are not native Devanagari speakers.
Ease of Use: Requires minimal learning curve, as it relies on the phonetic sounds of words.
Limitations: May not capture complex characters accurately, leading to potential errors in formal documents.
⚠️ Important Note: Phonetic typing may not be suitable for official documents due to potential inaccuracies in character representation.
Devanagari Inscript vs Phonetic Typing: A Detailed Comparison
Efficiency and Speed
Aspect
Inscript Typing
Phonetic Typing
Typing Speed
Slower initially, faster with practice
Generally faster for beginners
Accuracy
High accuracy in character representation
May vary based on phonetic accuracy
Device Compatibility
Universally compatible
Requires specific software
User Learning Curve
Inscript typing has a steeper learning curve, demanding users to memorize key placements. However, once mastered, it offers high accuracy and speed. Phonetic typing, on the other hand, is intuitive and quick for beginners but may not cater to complex typing needs.
Choosing the Right Typing Method for You
Assessing Your Needs
To choose the right typing method, consider your specific requirements:
Professional Use: Opt for Inscript if you need precision and are working on official documents.
Casual Use: Phonetic typing is suitable for casual communication and quick typing tasks.
Future Trends in Devanagari Typing
The future of Devanagari typing is poised to evolve with advancements in AI and machine learning. Predictive text and voice recognition technologies are expected to enhance typing efficiency, offering users more intuitive experiences.
For further technical insights into Unicode and its role in standardizing scripts, refer to the [Unicode Consortium’s official documentation](https://unicode.org/standard/WhatIsUnicode.html).
In conclusion, whether you choose Inscript or Phonetic typing depends on your specific needs and proficiency level. Both methods have their unique strengths, catering to a diverse range of users. By understanding their differences, you can make an informed decision and enhance your Devanagari typing skills.
Frequently Asked Questions
What is the primary difference between Inscript and phonetic typing?
Inscript typing uses a fixed keyboard layout, while phonetic typing is based on sound representation.
Which typing method is faster for beginners?
Phonetic typing is generally faster for beginners due to its intuitive nature.
Can I use both typing methods interchangeably?
Yes, but it may require practice to switch seamlessly between the two methods.
Typeshala Not Opening on Windows 11? Here's the Real Fix
Updated September 2026Tested on Windows 11 24H2 & Windows 109 min read
Typeshala refuses to launch on Windows 11 for one specific technical reason — and it is not the one most guides tell you.
If Typeshala won't open on your Windows 11 PC, you have almost certainly already tried restarting, reinstalling and running it as administrator — and none of it worked. That's not your fault. Those fixes cannot work, because the actual problem is architectural.
Quick Answer
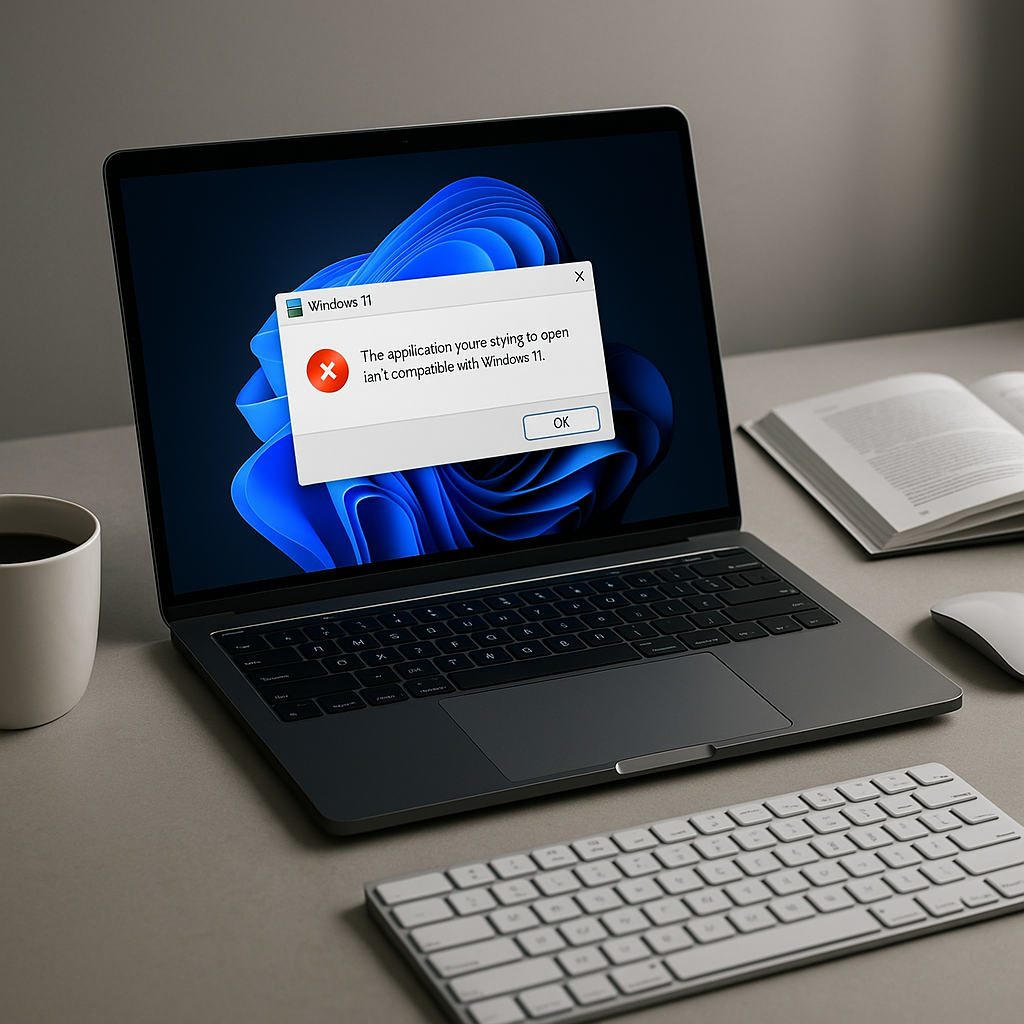
Typeshala (टाइपशाला) is a legacy 16-bit Windows program. All 64-bit versions of Windows — and Windows 11 ships in no other form — removed the NTVDM subsystem that ran 16-bit software. There is nothing left on your PC to execute it, which is why you get "This app can't run on your PC."
The fix: install OTVDM (winevdm), a free open-source 16-bit compatibility layer, then launch TYPSHALA.EXE through it. Compatibility Mode, updating, and reinstalling will not solve this on Windows 11. Full steps are below.
Why Typeshala Won't Open on Windows 11
Typeshala was built in the DOS and Windows 3.x era. You can see its age in the program itself: the main executable is named TYPSHALA.EXE in classic 8.3 uppercase format, and the whole application weighs under 100 KB. It is a 16-bit application.
That single detail explains everything. Modern Windows runs 32-bit software perfectly well through a translation layer called WOW64 — which is why most old programs still open fine. But 16-bit software needed a completely different component called NTVDM (the NT Virtual DOS Machine), and Microsoft never shipped NTVDM in 64-bit Windows at all.
Microsoft's own compatibility documentation is unambiguous: NTVDM is supported only on x86 (32-bit) Windows, and x64 and ARM versions "do not support 16-bit x86 code of any kind."
Now add the detail that makes Windows 11 a hard wall rather than an inconvenience: Windows 11 was never released in a 32-bit edition. Every single Windows 11 installation on earth is 64-bit or ARM. On Windows 10 you could at least turn NTVDM on if you happened to be running the 32-bit edition. On Windows 11 that option does not exist and never will.
This is why the usual advice fails
Updating Typeshala does nothing — the program hasn't been updated in over a decade and there is no newer build to install. Reinstalling does nothing — the files were never corrupted. Running as administrator does nothing — this is not a permissions problem. Even Compatibility Mode usually does nothing on Windows 11, because compatibility mode only changes how Windows reports itself to a program. It cannot restore a 16-bit subsystem that isn't installed.
You are not fixing a broken program. You are supplying the missing piece of Windows that the program needs. Once you understand that, the correct fix becomes obvious.
Match Your Error Message to the Real Cause
Different symptoms point to different problems. Find yours in the table below before you start changing settings.
What you see
What it actually means
What fixes it
"This app can't run on your PC"
The classic 16-bit block. Your 64-bit Windows has no NTVDM to run it.
Press Windows + I to open Settings, then go to System → About and look at System type. If it says 64-bit operating system, you have confirmed the diagnosis above — and if you're on Windows 11, it will always say this.
Check 2 — Make sure you have a complete Typeshala copy
A lot of Typeshala downloads floating around are incomplete: they contain the executable but not the lesson data files or the Preeti font, so even a successful launch gives you a broken program. Make sure your folder contains TYPSHALA.EXE along with its supporting data files before you start troubleshooting the launch itself.
Don't have a clean copy of Typeshala yet?
Start with a complete package that includes the lesson files and the Nepali font, then come back to the fix below. It will save you from chasing a launch problem that's really a missing-files problem.
Fix 1: Run Typeshala with OTVDM — The Method That Actually Works
OTVDM (also called winevdm) is a free, open-source 16-bit Windows emulator built specifically to run Windows 1.x–3.1 era software on modern 64-bit Windows. It is licensed under GPL-2.0 and maintained publicly on GitHub. In effect, it replaces the NTVDM component Microsoft removed — which is exactly what Typeshala needs.
This is the only method on this page that reliably works on Windows 11, and it's the approach the Nepali computer-training community has quietly standardised on. Some Typeshala bundles even ship otvdmw.exe alongside the program for this reason.
Download OTVDM from the official source
Get it from the project's own GitHub releases page — github.com/otya128/winevdm/releases. Download the latest otvdm.zip. Take it from here rather than from a random file-sharing mirror, so you know exactly what you're installing.
Install the Visual C++ runtime it depends on
OTVDM needs the 32-bit Microsoft Visual C++ Redistributable. If the extracted folder contains vc_redist.x86.exe, run that. Otherwise grab it directly from Microsoft's official redistributable page and install the x86 version — not x64. Skipping this step is the single most common reason people report that "OTVDM didn't work either."
Extract and install OTVDM
Right-click otvdm.zip and choose Extract All. Open the extracted folder, right-click install.inf and choose Install. Approve the User Account Control prompt. This registers OTVDM as the handler for 16-bit programs.
Launch Typeshala through OTVDM
You now have two ways to run it, and both work:
Drag and drop: drag TYPSHALA.EXE onto otvdm.exe.
Direct launch: after installing install.inf, simply double-click TYPSHALA.EXE — Windows now hands it to OTVDM automatically.
Typeshala should open in its familiar blue interface.
Create a desktop shortcut so you never repeat this
Right-click TYPSHALA.EXE → Show more options → Send to → Desktop (create shortcut). From now on Typeshala opens with one double-click like any normal app.
Why this works when nothing else does
Compatibility Mode lies to a program about which Windows version it's running on. OTVDM does something fundamentally different — it actually emulates the 16-bit environment itself. That's the difference between telling Typeshala what it wants to hear and giving it what it genuinely needs to execute.
Fix 2: Compatibility Mode — And Why It Usually Fails
Compatibility Mode is the fix you'll find in almost every forum thread and support answer about Typeshala, so it's worth being clear about when it helps and when it's a dead end.
It can work if you are running 32-bit Windows 10, 8 or 7. On those systems the 16-bit subsystem still exists and compatibility mode may be enough to coax Typeshala into launching. It will not work on Windows 11, or on any 64-bit Windows, for the architectural reason explained above.
If you're on 32-bit Windows 10 or older, here's the procedure:
Right-click TYPSHALA.EXE and choose Properties.
Open the Compatibility tab.
Tick Run this program in compatibility mode for and select Windows XP (Service Pack 3).
Also tick Run this program as an administrator.
Click Apply, then OK, and launch the program.
On 32-bit Windows 10, try enabling NTVDM first
Open Control Panel → Programs → Turn Windows features on or off and look for Legacy Components → NTVDM. Tick it, restart, and try Typeshala again. This option appears only on 32-bit editions — if you can't find it, you're on 64-bit Windows and OTVDM is your answer.
Fix 3: Run Typeshala in a Virtual Machine
If you're setting up a computer training centre, a school lab, or any environment where you need Typeshala to behave exactly as it always has, a virtual machine is the most faithful option.
Install VirtualBox (free), create a virtual machine running 32-bit Windows 7 or Windows XP, and install Typeshala inside it. Because the guest operating system is genuinely 32-bit, NTVDM is present and Typeshala runs natively with zero emulation quirks.
The trade-off is honest: it's heavier to set up, it uses more disk space and RAM, and you need a valid licence for the guest Windows. For a single student who just wants to practise typing tonight, OTVDM is far more practical. For a lab of twenty machines that must be identical and reliable, a VM image you can clone is worth the effort.
Fix 4: Skip the Hassle — Use an Online Typeshala
Here's the pragmatic truth many guides won't tell you: if your goal is to learn Nepali typing rather than to run this specific 20-year-old program, you may not need to fix any of this.
Browser-based Typeshala clones now reproduce the original lesson structure, the Preeti keyboard layout and the speed-and-accuracy scoring, and they run on any device with no installation, no emulator and no compatibility issues at all. Options include typeshala.typingkeyboards.com and nepalitypeshala.com.
When the online version is genuinely better
Use it if you're on a Mac, a Chromebook, an ARM-based Windows laptop, or a school PC where you can't install software. Stick with desktop Typeshala if you need to work offline, or if your course or examination board specifically requires the original program.
Which Method Should You Choose?
Method
Works on Windows 11
Difficulty
Best for
OTVDM (winevdm)
Yes
Easy — 5 minutes
Almost everyone. The default recommendation.
Compatibility Mode
No
Very easy
32-bit Windows 10/8/7 only.
Virtual machine
Yes
Advanced — 30+ minutes
Training centres, labs, exam setups.
Online Typeshala
Yes
None — instant
Learners, Mac/ARM users, locked-down PCs.
Reinstall / update
No
—
Nothing. This never addresses the real cause.
Windows 11 Roadblocks: S Mode, SmartScreen & ARM
Windows 11 adds three obstacles that didn't exist on older systems. Any one of them can stop Typeshala even after you've installed OTVDM correctly.
SmartScreen: "Windows protected your PC"
Typeshala and OTVDM are unsigned by modern standards, so SmartScreen warns you. This is a reputation warning, not a virus detection. Click More info, then Run anyway — but only when you downloaded the file from a source you trust, such as the official GitHub releases page linked above.
Windows 11 S Mode blocks it entirely
If your PC is in S Mode, it will refuse to run any application that didn't come from the Microsoft Store, and no fix on this page will work until you leave S Mode. Go to Settings → System → Activation and choose Switch to Windows 11 Home/Pro. It's free and permanent — but note you cannot switch back afterwards.
Microsoft Defender may quarantine old files
Decades-old executables sometimes trip heuristic detection. If Typeshala vanishes after extraction, check Windows Security → Protection history. You can add an exclusion for the Typeshala folder under Virus & threat protection → Manage settings → Exclusions — do this only for files you obtained from a source you trust.
ARM-based Windows laptops
On Snapdragon/ARM devices, Windows emulates x86 software but 16-bit support is absent at an even deeper level. OTVDM is unreliable here. On an ARM laptop, use the online Typeshala or a virtual machine instead.
Typeshala Opens but Nepali Won't Type? Fix the Preeti Font
This catches people out constantly: Typeshala launches perfectly, but Nepali lessons show as Roman letters or meaningless symbols. That isn't a launch failure at all — the program is working and the Preeti font is missing from your system.
Download the Preeti font file (.ttf).
Right-click it and choose Install for all users.
Restart Typeshala.
If it still displays incorrectly, open the program's Options or Settings menu and set the font to Preeti manually.
Preeti is a legacy non-Unicode Nepali font, which is why it must be installed separately and why modern Unicode Nepali text won't display correctly inside Typeshala.
Still Stuck? Final Troubleshooting Checklist
Work down this list in order — each item resolves a distinct failure mode:
Confirm you installed the x86 Visual C++ Redistributable, not the x64 one.
Re-run install.inf as administrator — if the first attempt silently failed, nothing else will work.
Extract the Typeshala folder somewhere simple like C:\Typeshala. Long paths, spaces and non-English folder names can break very old programs.
Move it out of Program Files — legacy apps often can't write to protected directories.
Temporarily pause real-time antivirus protection, launch once, then re-enable it.
Verify your download isn't a partial or corrupted archive by re-extracting it fresh.
Check Task Manager → Details while launching — if otvdm.exe appears and disappears, the runtime dependency is still missing.
If every step fails, fall back to the online Typeshala and move on with your practice.
Key takeaways
The cause is architectural, not a bug. Typeshala is 16-bit; 64-bit Windows removed 16-bit support entirely.
Windows 11 has no 32-bit edition, so enabling NTVDM is not an option on it — ever.
OTVDM (winevdm) is the working fix for Windows 11 and 64-bit Windows 10.
Updating, reinstalling and running as admin cannot help, because nothing is broken or corrupted.
If you only want to learn typing, an online Typeshala removes the problem completely.
Frequently Asked Questions
Why is Typeshala not opening on Windows 11?
Because Typeshala is a 16-bit application and Windows 11 is 64-bit only. All 64-bit versions of Windows removed NTVDM, the component that ran 16-bit software, so there is no subsystem available to execute the program. Installing the free OTVDM (winevdm) compatibility layer restores that capability and lets Typeshala launch normally.
Does Typeshala work on Windows 11 at all?
Yes, but not on its own. With OTVDM installed it runs reliably on Windows 11, including the latest builds. Without a 16-bit compatibility layer it cannot start under any circumstances, no matter which settings you change.
Is Typeshala 32-bit or 64-bit?
Neither — it is a 16-bit program from the DOS/Windows 3.x era. This is the detail most guides get wrong. A 32-bit program would run fine on 64-bit Windows through WOW64; the fact that Typeshala doesn't is precisely what proves it's 16-bit.
Why does compatibility mode not fix Typeshala?
Compatibility mode only changes what version of Windows the program is told it's running on. It cannot install a missing subsystem. Since 64-bit Windows contains no 16-bit execution environment at all, there is nothing for compatibility mode to fall back on. It can help on 32-bit Windows 10 and older, but not on Windows 11.
What does "This app can't run on your PC" mean for Typeshala?
It's Windows telling you the executable's architecture is incompatible with your system — in this case, a 16-bit program on 64-bit Windows. It does not mean the file is corrupted, infected or incorrectly downloaded, so re-downloading it will produce exactly the same message.
Is OTVDM (winevdm) safe to use?
It is an open-source project released under the GPL-2.0 licence with its source code publicly available on GitHub. As with any software, download it only from the official GitHub releases page rather than from third-party mirrors, and expect a SmartScreen warning because the files are unsigned.
Can reinstalling Typeshala fix the opening issue?
No. Reinstalling replaces files that were never damaged. The problem lies in your operating system's missing 16-bit support, not in the Typeshala files, so a fresh copy will fail in exactly the same way.
Can I run Typeshala on a Mac or a Chromebook?
Not natively — Typeshala is a Windows-only program. Use a browser-based Typeshala instead, which works identically on macOS, ChromeOS, Linux and mobile devices with no installation required.
Why does Typeshala open but show Nepali as strange symbols?
The Preeti font isn't installed on your system. Typeshala relies on this legacy non-Unicode Nepali font to display Devanagari characters. Install the Preeti .ttf file, restart the program, and select Preeti in its Options menu if needed.
Is there a modern alternative to Typeshala?
Yes. Online Nepali typing tutors reproduce Typeshala's lesson structure and Preeti keyboard layout in the browser, with no installation or compatibility issues. They're the practical choice if your goal is learning to type rather than running this particular program.
Typeshala has outlived the operating system it was written for by more than twenty years, which is a genuine testament to how well it taught a generation of Nepali typists. It just needs one small bridge to keep going on modern hardware. Install OTVDM once, make your desktop shortcut, and you can carry on exactly as before.
Need the software itself?
If you still need a complete Typeshala package with the lesson files and Nepali font included, the full download guide walks through it step by step.
Typesalute Typing Tutor: Enhance Your Typing Skills Today
Are you struggling to improve your typing speed and accuracy? The Typesalute typing tutor offers a comprehensive solution for users aiming to enhance their keyboard skills. From students to seasoned professionals, Typesalute provides personalized lessons tailored to various skill levels, ensuring a structured and effective learning experience.
Understanding Typesalute Typing Tutor
The Typesalute typing tutor stands out with its user-centric design and a suite of features aimed at boosting your typing proficiency. Let’s dive into what makes Typesalute a top choice for typing learners.
Key Features of Typesalute
Typesalute is packed with features designed to cater to different learning needs:
Personalized Learning Paths: Typesalute adapts to your typing level, offering exercises that evolve as you progress.
Interactive Exercises: Engage with diverse exercises targeting speed, accuracy, and finger dexterity.
Real-time Feedback: Immediate performance feedback helps you identify and correct mistakes swiftly.
For more technical specifications, refer to the [Typesalute official documentation](https://example.com/docs).
Benefits of Using Typesalute
Choosing Typesalute brings several advantages:
Enhanced Typing Speed: Users often report notable improvements in their typing speed after consistent practice.
Improved Accuracy: The focus on precision helps reduce typing errors, a crucial skill in professional environments.
User-Friendly Interface: The intuitive design ensures that even beginners can navigate the software with ease.
💡 Pro Tip: Set goals within Typesalute to track your progress and stay motivated as you advance.
How to Get Started with Typesalute
Getting started with Typesalute is straightforward. Follow these steps to begin your typing journey:
Installation Guide
Download: Visit the official Typesalute website to download the latest version of the software.
Install: Run the installer and follow the on-screen instructions to complete the setup.
Setting Up Your Profile
Create an Account: Register with your email to start using Typesalute.
Customize Your Profile: Input your current typing speed and goals to receive personalized lesson plans.
Start Practicing: Access the dashboard and begin with the recommended exercises.
⚠️ Note: Ensure your device meets the system requirements for optimal performance.
Typesalute Typing Tutor in Action
Typesalute is not just a tool; it’s a game-changer for anyone looking to refine their typing skills. Here’s how it can transform your typing experience:
Real-world Applications
Incorporating Typesalute into your routine can significantly enhance productivity, especially in roles requiring extensive typing. Whether drafting reports or coding, faster typing means more efficient work processes.
User Testimonials
Many users have shared success stories, highlighting how Typesalute helped them achieve their typing goals. From students excelling in exams to professionals meeting tight deadlines, the feedback is overwhelmingly positive.
💡 Pro Tip: Regular practice, even just 10 minutes a day, can lead to substantial improvements over time.
Conclusion
The Typesalute typing tutor is an invaluable resource for anyone serious about developing their typing skills. Its comprehensive features and user-friendly approach make it suitable for all levels, from beginners to advanced typists. By following the steps outlined above, you can start your journey towards becoming a proficient typist today.
For further exploration and resources, visit our [related post](https://example.com/related-post) on enhancing productivity with improved typing skills.
Frequently Asked Questions
What is Typesalute typing tutor?
Typesalute is a software designed to help users improve their typing skills through interactive lessons and exercises.
How does Typesalute improve typing skills?
It offers personalized exercises and real-time feedback to enhance typing speed and accuracy.
Is Typesalute suitable for beginners?
Yes, it is designed for all levels, providing tailored lessons for beginners to advanced users.
Can professionals benefit from Typesalute?
Absolutely, it helps professionals improve efficiency by increasing typing speed and accuracy.
Where can I download Typesalute?
Typesalute can be downloaded from the official website or authorized distributors.
Mastering Top Eleven 352 Tactics for Winning Games
In the realm of football management games, mastering the “Top Eleven 352 tactics” can be the key to transforming your virtual team into a formidable force on the field. The 352 formation, known for its robust midfield and dynamic play, offers a unique blend of defensive solidity and attacking prowess. However, understanding how to leverage this setup effectively requires insight into its nuances and strategic adjustments against various opponents.
Understanding the 352 Formation in Top Eleven
Key Characteristics of 352
The 352 formation in Top Eleven is characterized by three central defenders, two wing-backs, three central midfielders, and two strikers. This setup provides a strong presence in the midfield, allowing for flexibility and control.
Feature / Aspect
Details
Recommendation
Defensive Setup
Three central defenders
Ensure they have good tackling and positioning skills
Midfield Control
Three central midfielders
Utilize versatile players with high stamina
Wing Play
Two wing-backs
Players should be capable of supporting both attack and defense
The use of wing-backs is pivotal as they must assist both in defense and attack, requiring high stamina and versatility.
Advantages and Disadvantages
The primary advantage of the 352 formation is its ability to dominate the midfield, making it ideal for possession-based play. However, it may leave the flanks vulnerable, especially against teams that utilize pacey wingers.
⚠️ Note: The 352 formation requires wing-backs who can endure the physical demands of covering large areas of the pitch.
Implementing Effective Top Eleven 352 Tactics
Defensive Strategies
To maximize the effectiveness of the 352 tactics, focus on utilizing the wing-backs to maintain defensive solidity. They should drop back during opponent attacks and contribute to creating a compact defensive line.
Position the wing-backs to track back quickly against wide attacks.
Instruct central defenders to maintain a tight formation, cutting off central attacking threats.
Use a defensive midfielder to shield the back three and intercept passes.
Attacking Play
When transitioning to attack, the 352 formation allows for quick exploitation of spaces due to its strong midfield presence.
Encourage wing-backs to push forward and provide width.
Focus on quick transitions from defense to attack using central midfielders.
Deploy strikers to press high and exploit defensive weaknesses.
💡 Pro Tip: Utilize through balls and one-twos between midfielders and strikers to break down compact defenses efficiently.
Adapting 352 Tactics Against Different Opponents
Countering Aggressive Teams
Against high-pressing opponents, it’s crucial to adjust player roles to maintain composure and control.
Instruct midfielders to hold the ball and dictate pace.
Deploy wing-backs strategically to exploit the space left by aggressive teams.
Playing Against Defensive Setups
When facing defensive teams, creativity in midfield becomes essential.
Use creative midfielders to find gaps and deliver incisive passes.
Encourage strikers to drop deep and link up play to draw defenders out of position.
⚠️ Note: Be prepared to switch formations if your 352 setup struggles to penetrate deep defensive lines.
Advanced Tips for Mastering Top Eleven Gameplay
Player Training and Development
Regular training is essential to ensure players fit the specific roles required by the 352 formation.
Focus training on enhancing stamina and tactical awareness for wing-backs.
Develop midfielders to be versatile, capable of both defensive duties and creative play.
In-Game Adjustments
During matches, adaptability is key. Make tactical adjustments based on the opponent’s style.
Monitor opponent strategies and adjust player roles accordingly.
Utilize substitutes to maintain high energy levels, especially for wing-backs.
💡 Pro Tip: Keep an eye on the opponent’s formation changes and be ready to tweak your tactics dynamically.
For more insights on formation and tactics, refer to the [official documentation](https://topeleven.com/formation-guide) provided by the game publisher. By mastering these Top Eleven 352 tactics, you can enhance your managerial prowess and lead your team to victory across various match scenarios.
Frequently Asked Questions
What are the main strengths of the 352 formation?
The 352 formation excels in midfield control and flexibility, making it suitable for possession-based play.
How can I counter a team using the 352 formation?
Exploit the flanks and use pacey wingers to stretch the defense.
Which players are ideal for the 352 formation in Top Eleven?
Players with high stamina and versatility, especially wing-backs and midfielders, are crucial.
Is the 352 formation suitable for all match situations?
While versatile, it may struggle against teams with strong wingers; adjustments may be needed.
Ready to Elevate Your Results?
Ready to elevate your workflow? Follow our recommended steps and take action today.