Select Page

Create Realistic Textures in Blender 3D: A Step-by-Step Guide
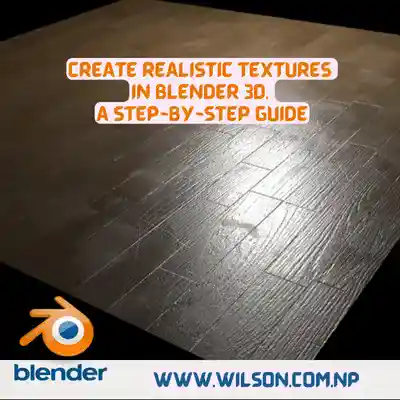
Create Realistic Textures in Blender 3D A Step-by-Step Guide

Creating realistic texture can be challenging as it requires attention to detail and an understanding of materials and lighting. Without proper techniques, the texture may appear flat or unrealistic.

Here I will explain a step-by-step tutorial to help you create an eye-catching realistic appearing texture. In this guide, you will get all of the necessary steps for creating textures that look Real and visually pleasing.

I have practiced creating realistic textures and now I am going to share my experience with you guys. Hope my experience will help you and enlighten you. If any questions you can comment me down below I will be pleased to help you.

Here are Step-by-Step Processes to create a Realistic texture in Blender 3D

  1. Collect reference images:
    Object to create realistic texture. You can find these images online or take your own photographs. Collect images of the materials you are going to work on.
  2. Complete the Modeling and UVs:
    Before starting to create the texture you need to have your model and the UVs of that model ready.
  3. Choose a texture type:
    Open the texture editor in the main menu, go to the “Texture paint” tab, and change to “Texture Paint” mode. This will open the texture editor where we are going to do all the texture stuff.
  4. Texture painting:
    Use Blender’s texture painting tools to paint the textures onto the UV map. Start by painting the base color and then add layers for roughness, bump, normal maps, and specular maps. Pay attention to detail by using different brush types and sizes, blending colors, and adjusting opacity.
  5. Shading:
    Once you have your textures, create a material that mimics the real-world surface’s properties using Blender’s shading nodes. Experiment with different settings such as roughness, specular, and subsurface scattering to get the desired result.
  6. Lighting:
    Finally, add lights to your scene and position them accordingly. Adjust the intensity, color, and size to achieve a realistic lighting setup that complements your textures and shading.

Metallic Texture Painting in Blender 3D (Node Base):

  1. Add a cube or any object you want to texture paint on.
  2. In the Shading workspace, add a new material to the object.
  3. Create a new image texture to paint on by adding an image texture node and creating a new image with a desired resolution (e.g. 4K).
  4. Set the color space of the texture node to “non-color” because it’s a metallic map and not contributing to the base color.
  5. Connect the color output of the texture node to the metallic input of the material output.
  6. UV unwrap the object onto the image texture in the UV editing workspace.
  7. Switch back to the Shading workspace and enter Texture Paint mode.
  8. Use the brush tool to paint on the image texture to add metallic values.
  9. To create edge wear, use a node setup that combines the image texture with a dirt texture and a noise texture.
  10. Use the brush tool to paint on the edge wear node setup to add wear and tear effects to the object.

To export a bumpmap in Blender Follow these steps:

  1. Select the object that contains the bump map you wish to export.
  2. Within the Properties panel, select the Material Properties tab.
  3. Click on the Settings section and then click”Export Options” in the Settings section “Export Options” button.
  4. On the Export Options dialog box, choose “Bump” for the type of export you want to use.
  5. Select a that can be used for the bump maps. Common formats include PNG, JPEG, and TIFF.
  6. Choose a place for saving the bump maps file.
  7. Select on the “Export” option to download the bumpmap.

To successfully bake mesh using Blender, you must complete these steps:

  1. Create or import the item that you wish to bake.
  2. Create a new UV Map for an object if it doesn’t already have one. It’s as easy as visiting the Object Data Properties panel, selecting the UV Maps tab, then clicking on the plus icon to generate a new UV map.
  3. Create a brand-new image in The UV or Image Editor to serve as the map for creating the texture of your baked goods. To do this, open the Image menu and choose “New Image.”
  4. Select “Cycles” as the rendering engine on the Render Properties panel.
  5. On the Bake tab of the Render Properties panel, select either “Diffuse” or “Combined” according to your requirements.
  6. Select your destination UV map, and then use the texture map you created previously as its texture map.
  7. Make any necessary adjustments, such as the image size or sample count.
  8. Click “Bake” to begin baking. This will initiate your baking process.
  9. Once the baking has been completed, save the finished picture by opening the Image menu and choosing “Save as.”

Materials for Blender 3D:

  1. Create Your Own Materials: In Blender, the Shader Editor lets you design materials from scratch. To access it, go to the main menu and select “Window” > “Shader Editor”. Here, you can add nodes and adjust their properties with ease.
  2. Utilize Blender’s Built-in Materials: Blender comes equipped with a selection of pre-made materials you can use for texture painting. To access them, go to the Properties panel and select the Material tab. From there, you have access to an extensive library of pre-made textures.
  3. Utilize external material libraries: There are a number of websites and resources offering free or paid materials libraries you can download and use in Blender. Popular options include Poliigon, Substance Source, and Texture Haven. To utilize these materials in Blender, simply import them using the Material Properties panel.
  4. Create Your Own Material Library: If you have created materials from scratch or downloaded them from external sources, you can save them as a material library in Blender. To do so, go to the Properties panel and select the Material tab. From there, click “+” next to each material slot and choose “New Material Library”. Afterward, add your materials to this library and save it for future reference.
[dsm_blog_carousel include_categories=”115″ use_excerpt=”off” use_date=”off” use_author=”off” centered_slides=”on” _builder_version=”4.20.1″ _module_preset=”default” global_module=”234877″ global_colors_info=”{}”][/dsm_blog_carousel]

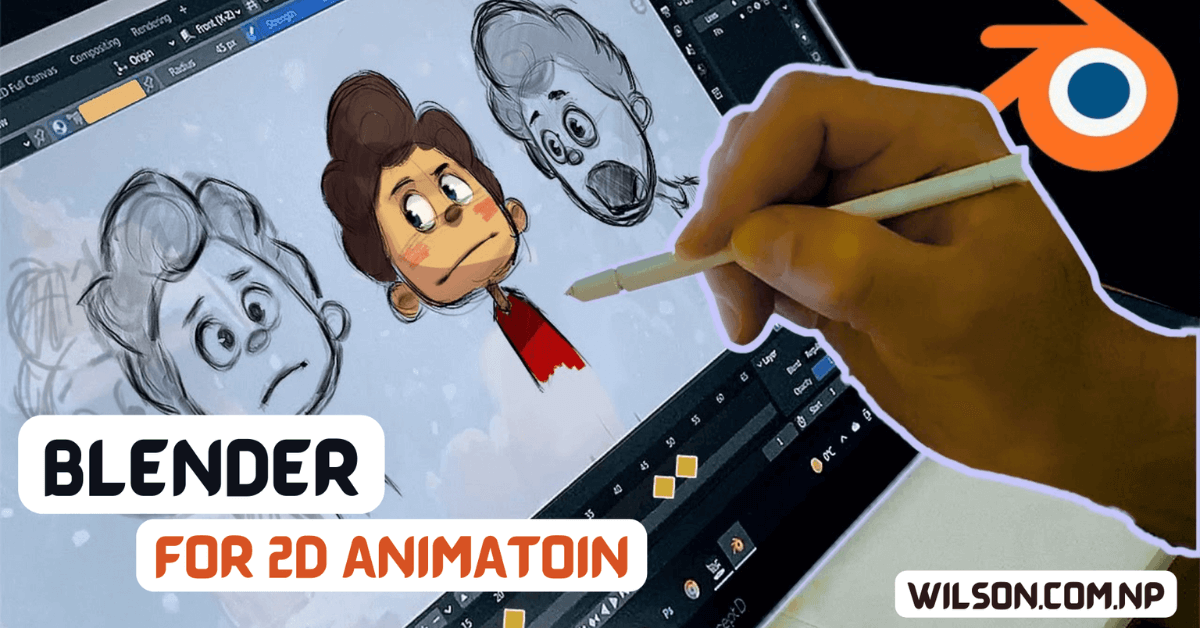
Is Blender the Future of 2D Animation? Find Out Why Experts Says

is blender good for 2d animation

2D animation is a type of illustration that involves creating movement within two dimensions. It has been an iconic medium for storytelling, advertising, and entertainment for decades – from classic Disney cartoons to contemporary anime – showing that its applications and techniques have evolved significantly over time.

Blender is an impressive software used primarily for 3D animation, but it can also produce quality 2D animations. Thanks to its user-friendly interface and comprehensive set of tools, Blender has become a go-to choice among animators across various industries.

In this article, we’ll investigate whether Blender is a viable software option for 2D animation. We’ll cover both its advantages and drawbacks, as well as offer tips on how to maximize its capabilities. Whether you’re an experienced artist or just starting out, this guide will give you a comprehensive view of Blender’s potential in this regard.

Is Blender is good for 2D Animation?

Blender is primarily known for its 3D animation capabilities, though it does have some 2D capabilities as well. However, for true 2D animation, there are better alternatives such as Adobe Animate, Toon Boom Harmony or open-source programs like Krita or OpenToonz which offer better options.

Blender’s 2D animation tools are somewhat limited, and while they can produce impressive results, they may not be as user-friendly or intuitive as other dedicated 2D animation software packages. Basic drawing and painting tools, a timeline editor for animation, as well as effects like color grading and compositing are all included.

Why Use Blender for 2D?

One of the primary advantages of Blender for 2D animation is its versatility; you can use it to create traditional hand-drawn animations as well as digital ones using vector graphics, 2D rigs, and other techniques. Furthermore, there are plenty of tools in Blender to help with special effects, compositing, and postproduction work that will further enhance your 2D visuals.

Benefits of Blender for 2D Animation

  1. Free and Open-Source: Blender is free for anyone to use, with its open-source nature enabling users to modify and customize the software according to their individual needs.
  2. Blender’s Animation Tools Are Renowned for Their Strength and Flexibility: Blender’s animation tools are renowned for their strength and versatility, enabling users to craft complex 2D animations with ease.
  3. Customizable Interface: Blender’s user-friendly interface is highly customizable, allowing users to design their workspaces and arrange tools and panels according to their workflow.
  4. Blender Has an Engaging User Community: Blender boasts a vibrant user community, so users can find help and support online with ease.
  5. Cross-Platform Compatibility: Blender is compatible with Windows, Mac and Linux operating systems, making it accessible to a wide range of users.
  6. Seamless Integration with 3D Animation: Blender is renowned for its 3D animation capabilities, but its 2D tools can be seamlessly combined to create complex scenes combining both 2D and 3D elements.
  7. Advanced Compositing: Blender’s powerful compositing tools let users create complex visual effects, making it the ideal solution for those combining 2D animation with visual effects.

Blender Limitations in 2D Animation

  1. Limited 2D Animation Tools: Blender’s 2D animation tools are somewhat limited compared to other dedicated 2D software options. While it does provide basic drawing and painting tools, they may not be as robust or intuitive as other options available on the market.
  2. Steep Learning Curve: Blender is an intricate program with a steep learning curve, especially for those new to 3D animation. While those already acquainted with the program may find it simpler, beginners may struggle to figure out how to utilize it effectively for 2D animation projects.
  3. Not Specifically Engineered for 2D Animation: While Blender’s 2D animation tools can be helpful, the software was primarily created with 3D animation in mind. As such, some of its features and tools may not be as well-suited to 2D animation as those offered by software tailored specifically for this purpose.
  4. Time Consuming: Producing 2D animations in Blender can be time-consuming, as users must construct and rig their characters, set up the scene, and tweak animation settings accordingly.
  5. Resource-Intensive: Blender can be resource intensive, especially when rendering complex animations. In order to ensure smooth playback and rendering, users may require a powerful computer with an excellent graphics card.

Conclusion

Blender is an impressive piece of software suitable for 2D animation. Its advantages include being free and open-source, featuring powerful tools, a customizable interface, cross-platform compatibility, seamless integration with 3D animation software, as well as advanced compositing capabilities. On the downside however, Blender also has some limitations such as limited 2D animation options, steep learning curve, lack of specificity in this regard, lengthy setup process and resource requirements.

Overall, whether Blender is suitable for 2D animation depends on the user’s individual needs and preferences. Those who are already acquainted with Blender and wish to combine 2D and 3D effects may find it useful, while those primarily interested in creating visuals of two dimensions may require software specifically designed for this purpose.

Further exploration can lead users to other software options designed specifically for 2D animation, such as Adobe Animate or Toon Boom Harmony. Furthermore, users can consult online tutorials and resources on how to utilize Blender more efficiently when creating 2D artwork.

Best Blender Tutorial for 2D Animation

Here is a step-by-step process:

  1. Gather reference materials.
  2. In Blender, delete everything and create a flat scene by switching to a top-down view.
  3. Use the “Import Images as Planes” add-on to import reference images into separate collections.
  4. Create shapes using circles from the curves menu and resize them to match reference images.
  5. Duplicate and place these shapes around the scene according to its reference image.
  6. Use busier circles for creating legs, adding edge loops for bendability.
  7. Create an IK rig or use the one provided in the project file.
  8. Parent shapes to bones in the hierarchy.
  9. Test it by going into pose mode and shifting bones around.
  10. Use automatic weights to rig bendy legs securely and eliminate unnecessary deformations.
  11. Create an animated scene by scaling, rotating and moving elements to match the reference.
  12. Add a sunlight with zero specular and no shadows for a vector look.
  13. Change from filmic to standard view transform and adjust gamma for color balance.
  14. Use an autographic lens type for camera to achieve flat visuals.
  15. Render the scene using your camera.
[dsm_blog_carousel include_categories=”115″ use_excerpt=”off” use_date=”off” use_author=”off” centered_slides=”on” _builder_version=”4.20.1″ _module_preset=”default” global_colors_info=”{}” global_module=”234877″ theme_builder_area=”post_content”][/dsm_blog_carousel]

7 Best Tips & Guide for CALL OF WAR to Dominate the Game

call of war guide to win this game with tips & tricks with strategies

In this guide, you’ll gain invaluable knowledge from the basics of gameplay to advanced tactics for outmaneuvering opponents. Learn the most effective methods for building your economy, training troops and expanding territory. Gain insider tips on negotiating alliances, spying on enemy nations and launching devastating surprise attacks.

But that’s not all! This guide also features winning tips from top players, comprehensive analyses of each nation’s strengths and weaknesses, as well as in-depth analyses of Call of War’s mechanics. With this comprehensive resource at your disposal, you’ll be ready to tackle any challenge that comes your way in Call of War with ease.

Here are the lessons taught in Call of War:

  1. Early in the game, AI is generally passive. Attacking neighboring AI nations can provide a sense of accomplishment and success.
  2. Playing as part of a coalition provides security and expansion opportunities.
  3. It is essential to have a navy to safeguard your waters and stop enemy transport fleets from reaching your continent.
  4. Having allies beyond those of your adversaries can be invaluable.
  5. Being part of one cohesive nation and having control over everything can lead to better performance than being part of multiple nations with the same number of units.

Beginners Guide you must Follow to Win this Game

  1. Choose a doctrine and country to play as.
  2. Allies are the best option for beginners, offering various advantages like decreased production time, research costs, and upgrade costs.
  3. When selecting which country to play as, take into account whether they have access to the sea.
  4. Be familiar with the properties and strengths of each starting unit, such as anti-air, infantry, armored cars and interceptor.
  5. Gain knowledge about all the armored classes available in the game and use your chosen unit to attack each one appropriately.
  6. Be familiar with the resources in the game, such as food, goods, metal, oil and rare materials and how they are utilized to craft various units.
  7. Be sure to attack the right armored class with the appropriate unit.
  8. Visit the game’s wiki for more details regarding all resources and units available in it.

Here is a list of Economy Guides to be Noted

  1. Stay Awake to Your Economy: Your economy is the engine of your war machine, so it’s essential to always keep an eye on it.
  2. Building Types: In each province, there are three major building types: industry, recruitment stations and propaganda offices. Industry contributes to resource production while recruitment stations increase manpower production while propaganda offices boost morale.
  3. Building Restrictions: Industry and recruitment stations can only be built within one province, and their effects only pertain to that area. Furthermore, propaganda offices are restricted to the province where they are constructed.
  4. Building Upgrades: Cities can upgrade industry to level 5 while recruitment stations and propaganda offices may be upgraded to level 3, while local industry can also be built in rural provinces and brought up to level 3.
  5. Efficiency: Construct only one unit production building per city to conserve resources. Constructing multiple buildings that can only be utilized one at a time is an unnecessary waste of resources.
  6. Resource Management: Construct military production buildings, then upgrade all industries to level 1 according to your strategy and resource needs.
  7. Objective: By day 4, our goal is to have level 2 industry in each province and level 2 recruitment stations in all five cities, so that we don’t run out of manpower later on.
  8. Production Building Upgrades: When researching or using level 2 units, make sure to upgrade military production buildings to level 2 in order to avoid production time penalties.
  9. Propaganda Offices: Construct propaganda offices in the late game to combat morale issues. Each level can boost morale by 10 on level 1, 23 on level 2, and 40 on level 3.
  10. Capital management: Expansion quickly and move your capital to a province far from your core provinces can cause morale problems. Building propaganda offices is one solution to address this issue.

Noob players often make the following mistakes in Call of War

  1. Believing that militia is superior to basic infantry: Many new players mistakenly assume that militia is a great unit due to its cost-saving benefits, but in reality it should only be used as a last resort when faced with large sand dunes; standard infantry offers much greater protection at half the price point.
  2. Lack of understanding that an army moves at the speed of its slowest unit: Many new players don’t understand why troops move faster or slower. They may add air defense to their army but find themselves now slower and not as ready as before. To solve this problem, research mobile anti-aircraft units that can shoot enemy planes while moving; this will enable your army to maintain regular tank movement speeds.
  3. Researching is expensive and time-consuming: Some new players take a “no research stance” because research can be expensive and time-consuming. Unfortunately, not researching can result in weaker armies. Researching may be costly and time-consuming, but in the end it will give your army a stronger foundation.
  4. Declaring war on day one: either against a player or large NPCs, or declaring war against everyone is generally not recommended since players may lack the resources or units necessary to wage effective battle at the start of the game.
  5. Attacking ineffectively: such as using tanks in a city where they receive a minus 50 penalty or using anti-air units against ground units, will not yield victory in battles. Players must utilize their units strategically in order to achieve victory.
  6. Failing to use artillery correctly or incorrectly: Artillery is an invaluable unit in the game and can be incredibly helpful when used properly. Players must learn how to utilize this powerful unit effectively so they can fully benefit from its potential.
  7. Overtaking officers can lead to a shortage of resources and the inability to produce necessary units. Players should balance their officer count with their resource production.
  8. Neglecting to pay attention to morale: Morale is an integral factor in the game and can significantly impact a player’s capacity for victory. Players must maintain high spirits in order to remain competitive and stay ahead of other players.

Some best Attacking Strategies:

  1. Artillery-Based Strategy: This strategy utilizes a stack composed mainly of artillery units, supported by infantry and anti-aircraft units. To maximize efficiency, the stack should remain around 10-11 units with an armoured car for better vision and range. This tactic works best in early game when air units are weak enough to pose any threat. Position the stack defensively so as to shield its artillery units while firing on enemy stacks or positions from a safe distance.
  2. Blitzkrieg Strategy: This tactic employs tanks and infantry units to launch rapid, decisive attacks against enemy positions. The tanks break through enemy lines while infantry capture territory. Timing and positioning are critical for success; however, if not executed correctly could prove costly. Both strategies have their strengths and drawbacks which can be adjusted depending on the player’s playstyle and current game situation.

Blender: Is it Good for 3D Printing?

Blender is good for 3D printing Full information

3D printing has taken the world by storm, revolutionizing how we do manufacturing and design. It involves building physical objects from digital files layer by layer using materials like plastic, metal and even food – with increasing popularity comes confusion about if Blender, a 3D graphics software is suitable for 3D printing.

Yes, Blender is an excellent tool for 3D printing – and in this article, we’ll Explain why.

Blender’s 3D Modeling Capabilities

Blender is an impressive 3D modeling software, capable of crafting intricate and complex models suitable for 3D printing. It boasts numerous features that make it ideal for this purpose, such as the capacity to generate organic shapes and precise geometric structures.

One of the key strengths of Blender is its mesh modeling capabilities. Mesh modeling involves creating 3D models by manipulating vertices, edges and faces in three dimensions. Blender has an impressive mesh modeling system that enables precise measurements and detailed designs.

Blender offers a set of sculpting tools that let you easily craft organic forms, like characters and creatures, with ease. These capabilities let you add and remove digital clay for intricate details like wrinkles, bumps, and ridges.

Preparing Models for 3D Printing

Creating 3D models in Blender is only half the battle. To successfully 3D print a model, it needs to be prepared for printing. This involves a process called “slicing,” which involves breaking down the model into layers and creating a set of instructions for the 3D printer to follow.

Blender has several built-in tools that make this process easy. For example, it has a 3D print toolbox that allows you to check your model for errors, such as non-manifold geometry, which can cause printing problems. Blender also has a built-in slicer that allows you to slice your model and generate G-code, which is the language that 3D printers use to print objects.

Blender Now Supports 3D Printing Formats

When it comes to 3D printing, there are several file formats you can use for exporting your models. These include STL, OBJ, and AMF. Blender supports all these formats, making the process of exporting models for printing much simpler.

Blender offers a selection of 3D printing add-ons that make the process even simpler. For instance, the 3D Print Toolbox add-on enables direct export to a printer without the need for extra software.

Conclusion
Blender is an ideal tool for 3D printing, offering its advanced 3D modeling capabilities, convenient preparation tools, and support of popular 3D printing formats. No matter if you’re a novice or an experienced artist in 3D modeling, Blender makes creating 3D models ideal.

Here is Step by Step Process for 3d Printing in Blender

Step 1: Construct Your Model
To begin, design a 3D model in Blender. You can either sculpt it from scratch or download an already-made model from a repository. When 3D printing your model, ensure it has a “watertight” mesh – meaning, all holes or gaps should be filled to prevent issues during the printing process.

Step 2: Check Your Model for Errors
After designing your model, the next step is to check it for any mistakes that could affect the 3D printing process. Blender has an inbuilt tool called the “3D Print Toolbox,” which can help identify potential issues with your model. To access this, select your model and go to “Object Data Properties” > “Mesh Analysis” > “3D Print Toolbox”.

Step 3: Export Your Model
Once your model is free of errors, the next step is to export it in a format compatible with your 3D printer. Common file types for 3D printing include.STL,.OBJ and.PLY; to export your model go to “File” > “Export” then select your desired file format.

Step 4: Prepare Your Model for Printing
Before sending your 3D model off to be printed, you must prepare it first. This involves setting up the print bed and configuring printer settings so that your model prints correctly. Software such as Cura or Simplify3D can help with this step.

Step 5: Send Your Model to the Printer
Once your model is ready, send it off to your 3D printer for printing. Be sure that everything is calibrated correctly and that you have loaded the correct filament before beginning this step. Enjoy watching as your 3D model comes alive during printing!

Advantages of 3D Printing in Blender

  • User-Friendly Interface: Blender has been designed with simplicity in mind, even for novice users. Its intuitive interface enables users to quickly design and modify 3D models.
  • Powerful 3D Modeling Tools: Blender provides a robust selection of 3D modeling tools, enabling users to craft complex and detailed models with ease. This makes it an ideal choice for 3D printing projects where precision and accuracy are key components.
  • Cost-Effectiveness: Blender is a free and open-source software program, making it affordable for both hobbyists and professionals. This makes it an ideal option for those who want to explore 3D printing without investing in costly software.
  • Large Community: Blender boasts an active community of users who provide tips, tutorials, and resources. This makes it simple for users to get help when needed.

Disadvantages of 3D Printing in Blender:

  • Steep Learning Curve: Although Blender has a user-friendly interface, it can still take some time to become proficient with all its features. This may prove daunting for newcomers just starting out.
  • Limited Technical Support: Due to Blender’s open-source nature, technical support for users who run into issues or need help troubleshooting issues may be limited. This can be discouraging for those who require assistance in solving these problems.
  • Lack of Native 3D Printing Support: Although Blender can create 3D models suitable for printing, it does not possess native support for this task. This means users will have to export their designs into another software or tool in order to prepare them for production.
  • Limited Compatibility: Blender may not be compatible with all 3D printers or printing software. This could present a limitation for those wishing to utilize an exclusive printer or program.
[dsm_blog_carousel include_categories=”115″ use_excerpt=”off” use_date=”off” use_author=”off” centered_slides=”on” _builder_version=”4.23.1″ _module_preset=”default” hover_enabled=”0″ global_module=”234877″ global_colors_info=”{}” sticky_enabled=”0″][/dsm_blog_carousel]

Cookies Run Guide: Mastering the Art of Baking Delicious Cookies

cookies run kingdom guide with tips and tricks

Cookies Run Kingdom: Experience the Sweetest Adventure Game You’ll Ever Play

Are you searching for an addictive mobile game to get addicted to? Look no further than Cookies Run Kingdom from Devsisters Corporation. This thrilling adventure game revolves around cookies, frosting and a magical kingdom – everything you need to know about Cookies Run Kingdom!

Tips

  1. Save your crystals to pull new cookies from the Gacha.
  2. Keep your buildings busy to have a stock of items.
  3. Check events for free resources and extra tasks.
  4. Use toppings on your cookies and upgrade them.
  5. Focus on upgrading the cookies you mostly use.
  6. Upgrade your cookie houses to generate valuable resources.
  7. Buy the third sugar gnome hut to speed up building and upgrading.
  8. Send cookies on expeditions to collect loot.
  9. Use the Tree of Wishes to exchange materials.
  10. Watch videos to learn about new cookies and their playstyle.

A Complete Beginners guide to head starts in the beginning.

Invest in Quality Cookies: Select some great cookies to invest in, such as Eclair, Constant, Caramel or Strawberry Crepe. Don’t spend all your crystals on one banner; invest some of them instead into some quality treats so that you won’t get stuck without treats later on.Utilize Coupon Codes: Take advantage of available coupon codes such as People’s Choice Award and Dev Now to get a head start on your gacha pulls purchases.Prioritize building cookie houses: Your cookie houses are your main source of experience points or exp star jellies to level up your cookies. Build as many cookie houses as you can and level them up when you have enough resources.Mass-produce Basic Materials: Utilizing the “Mass Produce” button for basic materials helps you save time and prevents getting stuck in later missions.Focus on Wishes: Make your wishes a reality by fulfilling missions for both aurora materials and kingdom pass/event completion.Consider purchasing the kingdom pass: If you’re a daily player with the money to spare, consider purchasing the kingdom pass for its benefits like extra attempts on bounties and shorter refresh times in Kingdom Arena.Extend your kingdom towards soda island, trading port and harbor, and lavatory: As your kingdom level increases, these areas will become unlocked for use. Prioritize expanding towards these locations for their advantages.

Team compositions players can utilize during a game

DPS Team: This team specializes in dealing high damage to enemies. Common cookies used are Ginger Brave, Dark Choco Cookie and Cinnamon Cookie. Players should equip them with treasures which increase their attack power and critical hit rate as well as pets that increase their damage output.

Healer Team: This team prioritizes healing and maintaining the team’s health. It includes cookies such as Angel Cookie, Herb Cookie, Pancake Cookie, treasures and potions that enhance their healing powers.

Balanced Team: This team consists of DPSs, healers and tanks. It includes cookies such as Espresso Cookie, Milk Cookie and Snow Sugar Cookie as well as treasures and pets which enhance their performance.

The top 10 cookies to build in Cookie Run Kingdom

Wild Berry Cookie: This defensive unit can absorb a lot of damage and stun enemies, making it perfect for shielding your team from enemy attacks.
Venezia Financier Cookie: This defensive unit provides healing, attack and damage resistance buffs to the highest attacker on your team. It’s ideal for keeping everyone healthy while increasing their damage output.
Macaroon Cookie: This powerful magic user deals area damage and heals your team. It is ideal for taking down large groups of enemies while keeping everyone healthy.
Swaltz Walder Cookie: This charge unit provides AOE damage and crowd control buffs to your team, ideal for dealing with large groups of enemies while keeping them from attacking your group. It’s perfect for dealing damage to groups of enemies and keeping them away from attacking yours.
Purple Yam Cookie: This charge unit is built to be an unstoppable tank, featuring high damage resistance and HP buffs. It’s ideal for taking damage and shielding your team against attacks.
Moonlight Cookie: This magical user deals area damage and debuffs to enemies, making it ideal for dealing damage in groups and decreasing their effectiveness.
Alchemist Cookie: This magical user provides debuffs to enemies and buffs for your team. It can reduce enemy attacks’ effectiveness while increasing your own attacks’ power.
Sparkling Cookie: This defensive unit grants buffs to your team and debuffs to enemies, increasing team efficiency while decreasing enemy attacks’ effectiveness. It’s great for increasing team effectiveness and decreasing enemy attacks’ impact.
Lemon Cookie: This magical user provides debuffs and buffs to your team, decreasing enemy attacks’ effectiveness while increasing your own attacks’ power. It can be extremely useful in combatting various attacks.
Black Raisin Cookie: This charge unit deals AOE damage and buffs to your team. It is perfect for dealing damage to groups of enemies while increasing the effectiveness of your own attacks.

Gameplay

Cookies Run Kingdom is an engaging side-scrolling adventure game set in a magical kingdom full of delicious treats. Play as one of several teams of cookies, each with their own special abilities, as you navigate levels filled with enemies, obstacles and hidden items. The gameplay is straightforward yet addictive with intuitive controls that are simple to pick up but difficult to master.

Cookies Run Kingdom offers a vast variety of levels that are both exciting and challenging. Each one presents its own set of obstacles and enemies to conquer, so utilize your team’s special abilities to successfully traverse each one – whether that means jumping over obstacles, sliding under barriers, or using special attacks against enemies.

Characters

Cookies Run Kingdom offers an impressive selection of characters to play as. Each character has their own special abilities, from powerful attacks to protective shields. Some characters are better suited for certain levels than others, so it’s important to experiment with different teams in order to find the ideal combination for each level.

Cookies Run Kingdom offers players the chance to unlock characters by opening cookie jars, which can be purchased with gems or earned through gameplay. Furthermore, existing characters can be upgraded and leveled up through collecting cookies and levelling up. Doing so increases their stats and unlocks new abilities that make them even more formidable in battle.

In-Game Purchases

Cookies Run Kingdom is free to play, but there are in-game purchases that can help you progress more quickly through the game. For instance, gems with real money can be bought and used for cookie jars or speeding up upgrades. While these purchases aren’t necessary to enjoy the experience, they may come in handy if you want to advance faster or acquire certain characters more quickly.

Community

One of the greatest features of Cookies Run Kingdom is its vibrant community of players. There are various online forums, social media pages and Discord servers where players can connect and exchange tips and strategies while discussing the game. Whether you need advice on beating a certain level or just want to chat with other fans of the title, there’s a place for everyone in this expansive Cookies Run Kingdom online community.

Conclusion

Cookies Run Kingdom is an outstanding game perfect for anyone who appreciates sweet treats and challenging gameplay. With its diverse characters, varied levels, and enthusiastic community of players, there’s always something new to discover in this enchanting kingdom. Whether you’re an experienced gamer or just searching for a fun new mobile game to try, Cookies Run Kingdom definitely deserves checking out.